Installing KVM on CentOS 7 Linux server
How to install and configure KVM on CentOS 7 or RHEL servers? How to install KVM tool on CentOS 7 and use cloud images to install guest virtual machine? These are the questions we seek to answer in this article. Stay with us.
Kernel-based Virtual Machine or KVM is an emulation software for CentOS or RHEL 7. KVM turns your server into a control center. In this article, we will show you how to install and manage a virtual environment with the help of KVM tool on Linux CentOS 7 or RHEL 7. Also, the method of installing and managing virtual machines (VM) in a physical server using CLI will be explained. Make sure that the simulation technology or VT is enabled in your server’s BIOS. Meanwhile, you can check Intel VT CPU support and AMD-V emulation using the following command.
|
1
2
3
|
$ lscpu | grep VirtualizationVirtualization: VT-x |
Follow the steps below to install KVM tool on CentOS 7/RHEL 7 server.
Step 1) Install KVM tool
Type the following yum command.
|
1
|
# yum install qemu-kvm libvirt libvirt-python libguestfs-tools virt-install |

Installing KVM tool on CentOS 7/RHEL 7 Linux server
Start the libvirtd service.
|
1
2
3
|
# systemctl enable libvirtd# systemctl start libvirtd |
Step 2) Verify KVM installation
Make sure the KVM module is loaded with lsmod and grep commands.
|
1
|
# lsmod | grep -i kvm |
Step 3) Setting up the bridge network
A dhcpd-based bridge network is configured by libvirtd by default. You can check this issue using the following commands.
|
1
2
3
|
# brctl show# virsh net-list |
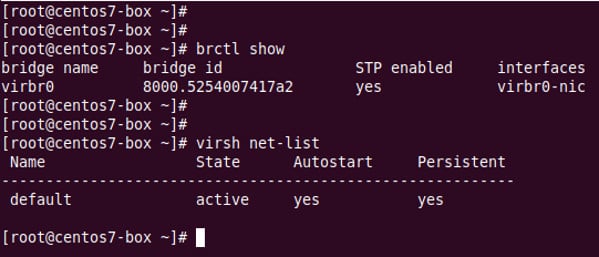
Default KVM network
All virtual machines (of guest type) only have network access to other VMs on the same server. Here, a private network 192.168.122.0/24 will be created for you. Check it out.
|
1
|
# virsh net-dumpxml default |
If you want your virtual machines to be available to other servers on the LAN, you need to set up a bridge network on the server connected to the LAN. For this purpose, update the nic configuration file such as ifcfg-enp3s0 or em1.
|
1
|
# vi /etc/sysconfig/network-scripts/enp3s0 |
Add the following line.
|
1
|
BRIDGE=br0 |
Save and close the file in vi. Then edit and add the /etc/sysconfig/network-scripts/ifcfg-br0 file.
|
1
|
# vi /etc/sysconfig/network-scripts/ifcfg-br0 |
Add the following lines.
|
1
2
3
4
5
6
7
8
9
10
11
12
13
14
15
|
DEVICE="br0"# I am getting ip from DHCP server #BOOTPROTO="dhcp"IPV6INIT="yes"IPV6_AUTOCONF="yes"ONBOOT="yes"TYPE="Bridge"DELAY="0" |
Restart the network service. Note that the ssh command will terminate and it is better to start over.
|
1
|
# systemctl restart NetworkManager |
Check the issue with the brctl command.
|
1
|
# brctl show |
Step 4) Create your first virtual machine.
Here we are going to create a VM on CentOS 7.x. First, get the latest version of the CentOS 7.x image using the wget command.
|
1
2
3
|
# cd /var/lib/libvirt/boot/# wget https://mirrors.kernel.org/centos/7.4.1708/isos/x86_64/CentOS-7-x86_64-Minimal-1708.iso |
Check ISO images
|
1
2
3
|
# wget https://mirrors.kernel.org/centos/7.4.1708/isos/x86_64/sha256sum.txt# sha256sum -c sha256sum.txt |
Creating a CentOS 7.x virtual machine
Here, we are going to create a CentOS 7.x virtual machine with 2 GB of RAM, two CPU cores, one nic and 40 GB of disk space. For this purpose we have:
|
1
2
3
4
5
6
7
8
9
10
11
12
13
14
15
16
17
18
19
|
# virt-install \--virt-type=kvm \--name centos7 \--ram 2048 \--vcpus=1 \--os-variant=centos7.0 \--cdrom=/var/lib/libvirt/boot/CentOS-7-x86_64-Minimal-1708.iso \--network=bridge=br0,model=virtio \--graphics vnc \--disk path=/var/lib/libvirt/images/centos7.qcow2,size=40,bus=virtio,format=qcow2 |
To set vnc input from another terminal via ssh we have:
|
1
2
3
|
# virsh dumpxml centos7 | grep vnc<graphics type='vnc' port='5901' autoport='yes' listen='127.0.0.1'> |
Here you need to write down the port number or 5901. To access the remote vnc server, you need to use an SSH client to set up the tunnel and a VNC client. Through the client or desktop, type the SSH port forwarding command as follows.
|
1
|
$ ssh [email protected] -L 5901:127.0.0.1:5901 |
Once the ssh tunnel is established, you can point your VNC client to localhost 127.0.0.1 and port 5901 as follows.

VNC client reference
In this case, you should see the CentOS Linux guest installation page as below.
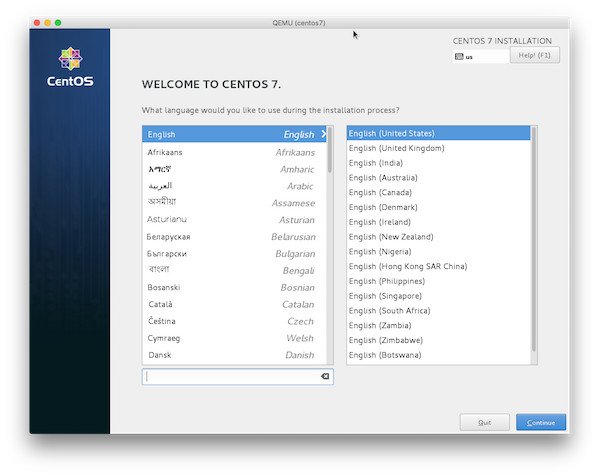
CentOS Linux installation welcome screen
Now just follow the instructions that appear on the screen and install CentOS 7. When the installation is finished, click the reboot button. The remote server has closed the connection with the VNC client. You can reconnect using the KVM tool to configure other parts of the server, including the SSH service or firewall.
How to build a RHEL 7.x virtual machine
First, you must have the rhel-server-7.3-x86_64-dvd.iso file saved. Here we create a RHEL 7.x virtual machine with 2 GB of RAM, two CPU cores, one nic and 40 GB of disk space.
|
1
2
3
4
5
6
7
8
9
10
11
12
13
14
15
16
17
18
19
|
# virt-install \--virt-type=kvm \--name rhel7 \--memory=2048,maxmemory=4096 \--vcpus=2 \--os-variant=rhel7.3 \--cdrom=/var/lib/libvirt/boot/rhel-server-7.3-x86_64-dvd.iso \--network=bridge=virbr0,model=virtio \--graphics vnc \--disk path=/var/lib/libvirt/images/rhel7.qcow2,size=40,bus=virtio,format=qcow2 |
To configure vnc input from another terminal via ssh we have:
|
1
2
3
|
$ sudo virsh dumpxml rhel7 | grep vnc<graphics type='vnc' port='5904' autoport='yes' listen='127.0.0.1'> |
Here you need to write down the port number or 5904. To access the remote vnc server, you need to use an SSH client to set up the tunnel and a VNC client. Through the client or desktop, type the SSH port forwarding command as follows.
|
1
|
$ ssh [email protected] -L 5904:127.0.0.1:5904 |
Once the ssh tunnel is established, you can point the VNC client to localhost 127.0.0.1 and port 5904 to proceed with the next steps of the RHEL 7.x installation.
Step 5) Using cloud images
The installation method presented above can be suitable for educational purposes or a virtual machine. But if you want to use more number of virtual machines, it is better to try cloud images. It will be possible to edit “pre-production” cloud images according to your needs. For example, you can add a user, enter ssh keys, and set the time zone. Now let’s see how to create a virtual machine with 1 GB of RAM, 20 GB of disk space and a vCPU in CentOS 7 in this way.
Download CentOS 7 cloud image
|
1
2
3
|
# cd /var/lib/libvirt/boot# wget http://cloud.centos.org/centos/7/images/CentOS-7-x86_64-GenericCloud.qcow2 |
Generating the required directories
|
1
2
3
4
5
6
7
|
# D=/var/lib/libvirt/images# VM=centos7-vm1 ## vm name ### mkdir -vp $D/$VMmkdir: created directory '/var/lib/libvirt/images/centos7-vm1' |
Create meta-data file
|
1
2
3
|
# cd $D/$VM# vi meta-data |
Add the following in this file.
|
1
2
3
|
instance-id: centos7-vm1local-hostname: centos7-vm1 |
Create user-data file
Here we want to log into the VM via ssh keys. Accordingly, first make sure that the ssh keys are in place.
|
1
|
# ssh-keygen -t ed25519 -C "VM Login ssh key" |
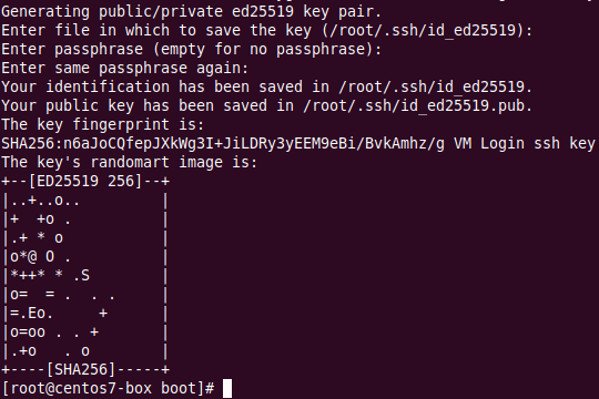
ssh-keygen command
Now edit user-data as below.
|
1
2
3
|
# cd $D/$VM# vi user-data |
Add the following according to your settings.
|
1
2
3
4
5
6
7
8
9
10
11
12
13
14
15
16
17
18
19
20
21
22
23
24
25
26
27
28
29
30
31
32
33
34
35
36
37
38
39
40
41
42
43
44
45
46
47
48
49
50
51
52
53
54
55
56
57
|
#cloud-config# Hostname managementpreserve_hostname: Falsehostname: centos7-vm1fqdn: centos7-vm1.nixcraft.com# Usersusers:- default- name: vivekgroups: ['wheel']shell: /bin/bashsudo: ALL=(ALL) NOPASSWD:ALLssh-authorized-keys:- ssh-ed25519 AAAAC3NzaC1lZDI1NTE5AAAAIIMP3MOF2ot8MOdNXCpHem0e2Wemg4nNmL2Tio4Ik1JY VM Login ssh key# Configure where output will gooutput:all: ">> /var/log/cloud-init.log"# configure interaction with ssh serverssh_genkeytypes: ['ed25519', 'rsa']# Install my public ssh key to the first user-defined user configured# in cloud.cfg in the template (which is centos for CentOS cloud images)ssh_authorized_keys:- ssh-ed25519 AAAAC3NzaC1lZDI1NTE5AAAAIIMP3MOF2ot8MOdNXCpHem0e2Wemg4nNmL2Tio4Ik1JY VM Login ssh key# set timezone for VMtimezone: Asia/Kolkata# Remove cloud-initruncmd:- systemctl stop network && systemctl start network- yum -y remove cloud-init |
Copy the cloud image.
|
1
2
3
|
# cd $D/$VM# cp /var/lib/libvirt/boot/CentOS-7-x86_64-GenericCloud.qcow2 $VM.qcow2 |
Create a 20 GB disk image
|
1
2
3
4
5
6
7
|
# cd $D/$VM# export LIBGUESTFS_BACKEND=direct# qemu-img create -f qcow2 -o preallocation=metadata $VM.new.image 20G# virt-resize --quiet --expand /dev/sda1 $VM.qcow2 $VM.new.image |

Set VM image disk size
Overwrite the resized image.
|
1
2
3
|
# cd $D/$VM# mv $VM.new.image $VM.qcow2 |
Create a cloud-init ISO file
|
1
|
# mkisofs -o $VM-cidata.iso -V cidata -J -r user-data meta-data |
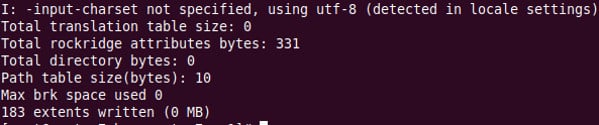
Create a cloud-init ISO file
Create a pool
|
1
2
3
|
# virsh pool-create-as --name $VM --type dir --target $D/$VMPool centos7-vm1 created |
Installing a CentOS 7 virtual machine
|
1
2
3
4
5
6
7
8
9
10
11
12
13
14
15
16
17
18
19
|
# cd $D/$VM# virt-install --import --name $VM \--memory 1024 --vcpus 1 --cpu host \--disk $VM.qcow2,format=qcow2,bus=virtio \--disk $VM-cidata.iso,device=cdrom \--network bridge=virbr0,model=virtio \--os-type=linux \--os-variant=centos7.0 \--graphics spice \--noautoconsole |
Delete unnecessary files
|
1
2
3
4
5
|
# cd $D/$VM# virsh change-media $VM hda --eject --config# rm meta-data user-data centos7-vm1-cidata.iso |
Find KVM device IP address or dhcp address
|
1
|
# virsh net-dhcp-leases default |

Creating a CentOS7 virtual machine
Log into the VM
Use the ssh command as follows.
|
1
|
# ssh [email protected] |
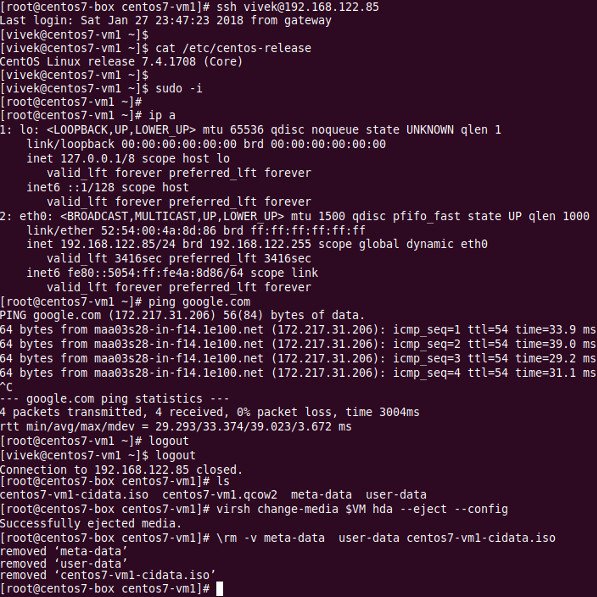
Sample VM implementation
Useful commands
We review some useful commands for managing virtual machines.
List of all VMs
|
1
|
# virsh list --all |
Get VM information
|
1
2
3
|
# virsh dominfo vmName# virsh dominfo centos7-vm1 |
Stopping and shutting down a VM
|
1
|
# virsh shutdown centos7-vm1 |
Start the VM
|
1
|
# virsh start centos7-vm1 |
Set the VM to start automatically at system startup
|
1
|
# virsh autostart centos7-vm1 |
Reboot (soft and safe reboot) the VM
|
1
|
# virsh reboot centos7-vm1 |
Reboot (hard and insecure) VM
|
1
|
# virsh reset centos7-vm1 |
Remove the VM
|
1
2
3
4
5
6
7
8
9
10
11
|
# virsh shutdown centos7-vm1# virsh undefine centos7-vm1# virsh pool-destroy centos7-vm1# D=/var/lib/libvirt/images# VM=centos7-vm1# rm -ri $D/$VM |
To see the general list of virsh command types, we have:
|
1
2
3
|
# virsh help | less# virsh help | grep reboot |
Notes about virt-builder
It is possible to quickly build virtual machine images in CentOS 7 using the virt-builder command.
List of VM images
|
1
2
3
4
5
6
7
8
9
|
virt-builder --listvirt-builder --list | grep -i fedoravirt-builder --list | grep -i debianvirt-builder --list | grep -i ubuntuvirt-builder --list | grep -i freebsd |
Creating Ubuntu 16.04 LTS virtual machine
|
1
2
3
4
5
6
7
8
9
10
11
12
13
|
# virt-builder ubuntu-16.04 \--size=20G --format qcow2 -o /var/lib/libvirt/images/ncbz01-disk01.qcow2 \--hostname ncbz01 --network --timezone Asia/Kolkata \--firstboot-command "dpkg-reconfigure openssh-server" \--edit '/etc/default/grub:s/^GRUB_CMDLINE_LINUX_DEFAULT=.*/GRUB_CMDLINE_LINUX_DEFAULT="console=tty0 console=ttyS0,115200n8"/' \--run-command update-grub |
Sample output (note that the random root password will be displayed on the screen):
|
1
2
3
4
5
6
7
8
9
10
11
12
13
14
15
16
17
18
19
20
21
22
23
24
25
26
27
28
29
30
31
32
33
34
35
|
[ 3.9] Downloading: http://libguestfs.org/download/builder/ubuntu-16.04.xz######################################################################## 100.0%[ 121.7] Planning how to build this image[ 121.7] Uncompressing[ 126.5] Resizing (using virt-resize) to expand the disk to 20.0G[ 142.1] Opening the new disk[ 143.8] Setting a random seed[ 143.8] Setting the machine ID in /etc/machine-id[ 143.8] Setting the hostname: ncbz01[ 144.3] Setting the timezone: Asia/Kolkata[ 144.3] Setting passwordsvirt-builder: Setting random password of root to 1KTLsuVx14k989eq[ 144.9] Finishing offOutput file: /var/lib/libvirt/images/ncbz01-disk01.qcow2Output size: 20.0GOutput format: qcow2Total usable space: 18.6GFree space: 17.7G (94%) |
Now that the image is created, it’s time to install the VM.
|
1
2
3
4
5
6
7
8
9
10
11
12
13
|
# virt-install --import --name ncbz01 \--ram 2048 \--vcpu 2 \--disk path=/var/lib/libvirt/images/ncbz01-disk01.qcow2,format=qcow2 \--os-variant ubuntu17.04 \--network=bridge=virbr0,model=virtio \--noautoconsole |
Performance:
|
1
|
# virsh start ncbz01 |
Log into the VM
|
1
|
# virsh console ncbz01 |
Conclusion
In this article, you learned how to install and set up the KVM tool on servers with CentOS 7 or RHEL 7 Linux operating systems. We hope that this article has also received your attention.