Archive

View the number of IPs connected to the server

Monitor Server Connections

This guide details how to view various connection details on your Linux server.

Prerequisites:

  • Access to your server via SSH client (e.g., Putty)

Steps:

  1. Total Connections: Use netstat -an | wc -l (faster and cleaner than toilet)

  2. Connections by Port (e.g., Port 80): Use netstat -an | grep 80 | wc -l

  3. Unique Connection Attempts: Use netstat -ntu | awk '{print $5}' | cut -d: -f1 | sort | uniq -c | sort -n

  4. Connections per IP and Port: Use netstat -na | awk '{print $5}' | cut -d "." -f1,2,3,4 | sort | uniq -c | sort -nr

  5. Connections per Port: Use netstat -tuna | awk -F':+| +' 'NR>2{print $5}' | cut -d: -f1 | sort | uniq -c | sort -n

  6. List IPs with Connection Count: Use netstat -anp | grep 'tcp\|udp' | awk '{print $5}' | cut -d: -f1 | sort | uniq -c | sort -n

By analyzing connection data, you can identify and block suspicious activity.

Application of Two-Factor Authentication in WHM

What is Two-Factor Authentication (2FA)?

2FA adds an extra layer of security to your login by requiring two verification methods. Typically, you’ll need your password and a temporary code from your phone. This ensures unauthorized access even if someone steals your password.

Setting Up 2FA in WHM:

1. Log in to WHM.

2. Navigate to Security Center > Two-Factor Authentication.

3. Enable 2FA:

- Toggle the switch "ON".
- The system will pre-fill your hostname as issuer information. Click "Save".

4. Choose a 2FA App (pick one):

- Google Authenticator (Android, BlackBerry, iOS)
- Duo Mobile (Android, iOS)
- Authenticator (Windows Phone)

5. Link Your WHM Account with the App:

- Open your chosen app on your phone.
- Select "Manage My Account" in WHM and click "Set up two-factor authentication".
- Choose either:
    - Scan the QR Code displayed in WHM with your app.
    - Enter the account details shown in WHM into your app manually.

6. Enter the 6-digit code from your app in WHM and click “Configure Two-Factor Authentication”.

7. A confirmation message will appear, indicating successful 2FA setup.

Benefits of 2FA:

  • Significantly improves WHM login security.
  • Protects against unauthorized access even if your password is compromised.

We hope this guide helps you secure your WHM!

Updating a Linux Server: A Step-by-Step Guide

Introduction:

Regularly updating your Linux server is crucial for maintaining its security and stability. This step-by-step guide will show you how to properly update your Linux server.

Steps:

  1. Connect to your Linux server: Connect to your Linux server using Putty or your preferred SSH tool.

  2. Execute the update command: Use the following command to update system packages and repository information:

sudo yum update
  1. Confirm the update: Once the scan is complete, the system will prompt you to confirm the updates. To confirm, press y and hit Enter.

  2. Verify update completion: Upon successful completion of the update process, you will see the message Complete.

  3. Reboot the server: To apply some updates, such as kernel updates, you need to restart the server. Use the following command to reboot the server:

sudo reboot

Important Notes:

  • Clear Yum cache: If you encounter errors during the update process, clear the Yum cache using the following command:
sudo yum clean all
  • Regular updates: For maintaining server security and stability, install updates regularly as they are released.

  • Backup: Before performing any critical updates, back up your server to be able to restore it to a previous state in case of any issues.

Conclusion:

By following these simple steps, you can easily update your Linux server and prevent security vulnerabilities and system instability.

What is a virtual cloud server?

Cloud Computing

Imagine storing, managing, and processing information over the internet instead of on your local computer. That’s the core idea behind cloud computing. This eliminates the need for powerful local machines and allows you to access your data remotely.

Virtual Servers

A virtual server acts like a dedicated server, but its resources are carved out from a physical server’s capabilities. This creates a cost-effective solution for running multiple applications.

Cloud vs. Normal Virtual Servers

Cloud virtual servers (VPS) are essentially the same as regular VPS, but with a key difference: infrastructure. Traditional VPS resides on a single physical server with limited hardware resources. If that hardware fails, all the virtual servers on it go down.

Cloud VPS, however, leverages the power of cloud computing. It has all the necessary software pre-installed and isn’t dependent on a single physical server. This allows for automatic migration between different physical servers within the cloud infrastructure, ensuring high availability and uptime.

How to buy cloud VPS?

To buy a virtual server, enter this link and choose one of the available plans and place an order.

How to check RAM usage in Linux

Check the amount of RAM usage with the commandfree:

free is the most common command to check Linux system memory usage. Shows information about total memory, used and free memory.

Usually, free is called with the -h option, which means to show the output in a human-readable format:

free -h

Output:

              total        used        free      shared  buff/cache   available  Mem:           3936        1087         252         130        2596        2427  Swap:             0           0           0

Meaning of each column:

  • total – the total amount of memory that can be used by programs.
  • used – Memory used.
  • free – free/unused memory.
  • shared  – This column can be ignored. This is shown for backward compatibility only.
  • buff/cache – combined memory used by core buffer and page and slab cache. This memory can be retrieved at any time if needed by applications.
  • available  – An estimate of the memory that is available to start new programs, without swapping.

The free command shows information about physical memory and system switching.

Check the amount of RAM usage with the commandtop:

top is a command-line utility that displays real-time information about running processes. It also shows a system summary, including memory usage.

To invoke the command, simply type top:

top

Output:


The output header contains information about the total, free and swapped physical memory of the system.

The %MEM column provides information about the share of available physical memory usage for each running process.

Checking the amount of RAM usage /proc/meminfo:

The easiest way to check the amount of RAM memory usage is to display the virtual content of the proc / proc / meminfo file. This file is used by free, top, ps and other system information commands.

Use less or cat to view the contents of the /proc/meminfo file:

cat /proc/meminfo

This file contains a lot of information about system memory and swap usage:

MemTotal:        4030592 kB  MemFree:          401804 kB  MemAvailable:    2507504 kB  ...

The information in the /proc/meminfo file can be parsed and used in shell scripts.

Check RAM usage with scriptps_mem:

ps_mem is a Python script that reports the amount of RAM memory used by each program. It works with Python 2 and 3 and can be installed with pip :

sudo pip3 install ps_mem

This script requires admin privileges. To launch it, type sudo ps_mem in your terminal:

sudo ps_mem

The output will contain the memory of each running program in ascending order:

 Private  +   Shared  =  RAM used	Program  ...   ۱۱٫۹ MiB +  20.2 MiB =  32.1 MiB	nginx (4)    ۸٫۲ MiB +  42.4 MiB =  50.6 MiB	systemd-journald   ۵۵٫۸ MiB + 307.2 MiB = 363.0 MiB	php-fpm7.4 (6)  ۲۳۳٫۹ MiB + 234.0 MiB = 467.9 MiB	redis-server  ۵۷۸٫۲ MiB + 578.6 MiB =   1.1 GiB	mysqld  ---------------------------------                            ۲٫۲ GiB  =================================  

This script is useful when you want to find out which running program is taking up most of your system memory.

Secure Apache with Let’s Encrypt on Ubuntu 20.04

Let’s Encrypt is a certificate authority created by the Internet Security Research Group (ISRG). It offers free SSL certificates through a fully automated process designed to eliminate manual certificate, validation, installation and license renewal. Certificates issued by Let’s Encrypt are valid for 90 days from the date of issue and are trusted by all major browsers today.

prerequisites

Ensure the following prerequisites are met before proceeding:

  • You are logged in as root or a user with sudo privileges.
  • The domain you want to obtain an SSL license for must point to your public server IP . We will use example.com.
  • Apache is installed.


Install Certbot

We will use Certbot to obtain the certificate. It is a command line tool that handles the tasks related to obtaining and renewing Let’s Encrypt SSL certificates. The certbot package is included in the default Ubuntu repositories. Update the package list and install certbot using the following commands:

sudo apt update  sudo apt install certbot


Generate the Strong Dh (Diffie-Hellma) group

Diffie-Hellman (DH) key exchange is a method for securely exchanging cryptographic keys over an insecure communication channel. To enhance security, create a new set of 2048-bit DH parameters:

sudo openssl dhparam -out /etc/ssl/certs/dhparam.pem 2048

You can change the size up to 4096 bits, but depending on the entropy of the system, it may take more than 30 minutes to generate.

Obtaining a Let’s Encrypt SSL license

To obtain an SSL certificate for the domain, we want to use the Webroot plugin, which creates a temporary file to verify the requested domain in the directory. ${webroot-path}/.well-known/acme-challenge

Let’s Encrypt server to validate the HTTP request to the temporary file to validate the requested domain to the server where Certbot is running.

Run the following instructions to create the directory and write it to the Apache server.

sudo mkdir -p /var/lib/letsencrypt/.well-knownsudo chgrp www-data /var/lib/letsencryptsudo chmod g+s /var/lib/letsencrypt

To avoid copying code and save more settings, create the following two configuration pieces:

Alias /.well-known/acme-challenge/ "/var/lib/letsencrypt/.well-known/acme-challenge/"  <Directory "/var/lib/letsencrypt/">  AllowOverride None  Options MultiViews Indexes SymLinksIfOwnerMatch IncludesNoExec  Require method GET POST OPTIONS  </Directory>
SSLProtocol all -SSLv3 -TLSv1 -TLSv1.1 SSLCipherSuite ECDHE-ECDSA-AES128-GCM-SHA256:ECDHE-RSA-AES128-GCM-SHA256:ECDHE-ECDSA-AES256-GCM-SHA384:ECDHE-RSA-AES256-GCM-SHA384 :ECDHE-ECDSA-CHACHA20-POLY1305:ECDHE-RSA-CHACHA20-POLY1305:DHE-RSA-AES128-GCM-SHA256:DHE-RSA-AES256-GCM-SHA384 SSLHonorCipherOrder off SSLSessionTickets off

SSLUseStapling On
SSLStaplingCache “shmcb:logs/ssl_stapling(32768)”

SSLOpenSSLConfCmd DHParameters "/etc/ssl/certs/dhparam.pem"
Header always set Strict-Transport-Security "max-age=63072000"


The above snippet enables OCSP Stapling, HTTP Strict Transport Security (HSTS), and enforces several security-oriented HTTP headers using Mozilla-recommended chips.

Before enabling the configuration files, ensure that both mod_ssl and mod_headers are enabled by issuing:

sudo a2enmod ssl  sudo a2enmod headers


Next, enable the SSL configuration files by running the following commands:

sudo a2enconf letsencryptsudo a2enconf ssl-params

Enable the HTTP/2 module, which makes your sites faster and more powerful:

sudo a2enmod http2

Download the Apache configuration to apply the changes:

sudo systemctl reload apache2

Now we can run the Certbot tool with the webroot plugin and get the SSL certificate files:

sudo certbot certonly --agree-tos --email [email protected] --webroot -w /var/lib/letsencrypt/ -d example.com -d www.example.com


If the SSL certificate is successfully obtained, certbot prints the following message:

IMPORTANT NOTES:   - Congratulations! Your certificate and chain have been saved at:     /etc/letsencrypt/live/example.com/fullchain.pem     Your key file has been saved at:     /etc/letsencrypt/live/example.com/privkey.pem     Your cert will expire on 2020-10-06. To obtain a new or tweaked     version of this certificate in the future, simply run certbot     again. To non-interactively renew *all* of your certificates, run     "certbot renew"   - Your account credentials have been saved in your Certbot     configuration directory at /etc/letsencrypt. You should make a     secure backup of this folder now. This configuration directory will     also contain certificates and private keys obtained by Certbot so     making regular backups of this folder is ideal.   - If you like Certbot, please consider supporting our work by:       Donating to ISRG / Let's Encrypt:   https://letsencrypt.org/donate     Donating to EFF:                    https://eff.org/donate-le

Now that you have the certificate files, edit your domain virtual host configuration as follows:

<VirtualHost *:80>   ServerName mail.digital.mk
Redirect permanent / https://mail.digital.mk/  </VirtualHost>
<VirtualHost *:443>  ServerName mail.digital.mk

Protocols h2 http:/1.1

<If "%{HTTP_HOST} == 'www.mail.digital.mk'">  Redirect permanent / https://mail.digital.mk/  </If>

DocumentRoot /var/www/mail.digital.mk/public_html
ErrorLog ${APACHE_LOG_DIR}/mail.digital.mk-error.log
CustomLog ${APACHE_LOG_DIR}/mail.digital.mk-access.log combined

SSLEngine On  SSLCertificateFile /etc/letsencrypt/live/mail.digital.mk/fullchain.pem  SSLCertificateKeyFile /etc/letsencrypt/live/mail.digital.mk/privkey.pem
# Other Apache Configuration
</VirtualHost>


With the above configuration, we force HTTPS and redirect from www to non-www version. Adjust easily to adjust the settings to suit your needs.

To apply the changes, reload the Apache service:

sudo systemctl reload apache2

You can now open your website using https:// and you will notice a green lock icon.

If you test your domain using SSL Labs Server Test, you will get an A+ grade as shown below:


Allow encrypted certificates to be valid for 90 days. To automatically renew certificates before they expire, the certbot package creates a cronjob that runs twice a day and automatically renews each certificate 30 days before they expire.

After renewing the certificate, we have to download the Apache service. Add the –ren-hook “systemctl reload apache2” attachment to the /etc/cron.d/certbot file so that it looks like this:

۰ */۱۲ * * * root test -x /usr/bin/certbot -a \! -d /run/systemd/system && perl -e 'sleep int(rand(3600))' && certbot -q renew --renew-hook "systemctl reload apache2"

To test the renewal process, you can use the certbot –dry run switch

sudo certbot renew --dry-run

If there is no error, it means that the renewal process was successful.

Installing RPM packages in Ubuntu

Before you begin:

This is not the recommended method for installing software packages in Ubuntu. If possible, preferably install software from the Ubuntu repositories.

Not all RPM packages can be installed on Ubuntu. Installing packaged RPMs on Ubuntu may result in package dependency conflicts.

You should never use this method to replace or update critical system packages such as libc, systemd, or other services and libraries that are necessary for your system to function properly. Doing so may result in system installation errors

Install Alien:

Alien is a tool that supports conversion between Red Hat rpm, Debian deb, Stampede slp, Slackware tgz and Solaris pkg.
Before installing the Alien package, make sure that the Universe repository is enabled on your system:

sudo add-apt-repository universe

After the repository is activated, update the package list and install the alien package with the following:

sudo apt update  sudo apt install alien

The above command also installs the necessary build tools.

Convert and install the RPM package:

To convert a package from RPM to DEB format, use the alien command followed by the name of the RPM package:

sudo alien package_name.rpm

Depending on the size of the package, the conversion may take some time. In most cases, you print warning messages on your screen. If the package is successfully converted, the output shows that the DEB package has been generated:

package_name.deb generated  

To install the deb package, you can use dpkg or apt:

sudo dpkg -i package_name.deb
sudo apt install ./package_name.deb

Assuming it is compatible with your system and all dependencies are met, the package should now be installed.

Direct installation of RPM package:

Instead of converting and then installing the package, you can use the -i option, which tells Alien to install the RPM package directly.

sudo alien -i package_name.rpm

The above command will automatically generate and install the package and after installation, remove the package.

who command in Linux

How to use the who command:

The main syntax of the who command is as follows:

who [OPTION]... [ FILE | ARG1 ARG2 ]  

When called without any options or arguments, the output is something like this:

root     pts/0        2020-11-17 20:10 (10.10.0.2)  shetaban    pts/1        2020-11-17 20:11 (10.10.0.8)

The who command produces a formatted list of all users currently logged into the system.

Each line consists of four fields separated by one or more spaces:

  • Registered user name
  • User terminal
  • When the user is logged in.
  • The hostname or IP address from where the user logged in. To force Ips, use the –ips option.

If you want to print column headings, add the -H (–heading) option:

who -h

Output:

NAME      LINE         TIME             COMMENT  root      pts/0        2020-11-17 20:10 (10.10.0.2)  linuxize  pts/1        2020-11-17 20:11 (10.10.0.8)

This command captures information about the system and people logged in from the /var/run/utmp file. If you want to use another file, pass the file path to the command.

The who command accepts two non-optional arguments. When invoked with two arguments, the command prints only information about the terminal associated with the current user. The same output is displayed when using the -m option.

You can use either argument:

who am i  who mom love  who foo bar  who -m

Each of the above commands prints the same information:

shetaban pts/1        2020-11-17 20:11 (10.10.0.8)  

who command options:

The who command accepts several rarely used options.

The -b, –boot option tells you who last printed the system boot:

         system boot  2020-07-20 19:02  

To get a list of all dead processes, use the -d, –dead option:

who -d

The -r, –runlevel option tells who to show the current level:

who -r

Output:

         run-level 5  2020-07-20 19:02  

To get just the username and the number of currently logged in users, use the -q, –count option:

who -q

Output:

root shetaban  # users=2

The -a option forces everyone to print all information:

who -a

Output:

system boot  2020-07-20 19:02  LOGIN      tty1         2020-07-20 19:02               673 id=tty1             run-level

The command to delete files and directories in Linux

Linux: A Powerful and Flexible Operating System

Linux, a popular open-source operating system, has gained the attention of many users due to its high stability, security, and flexibility. Unlike Windows, which uses a graphical user interface, many commands in Linux are executed by writing code in the command line. This may seem a bit complicated at first, but by learning the basic commands, you can easily take advantage of the power and efficiency of Linux.

Useful Linux Commands

In this article, we will introduce some of the useful and important Linux commands that every user should be familiar with.

Deleting Files and Directories

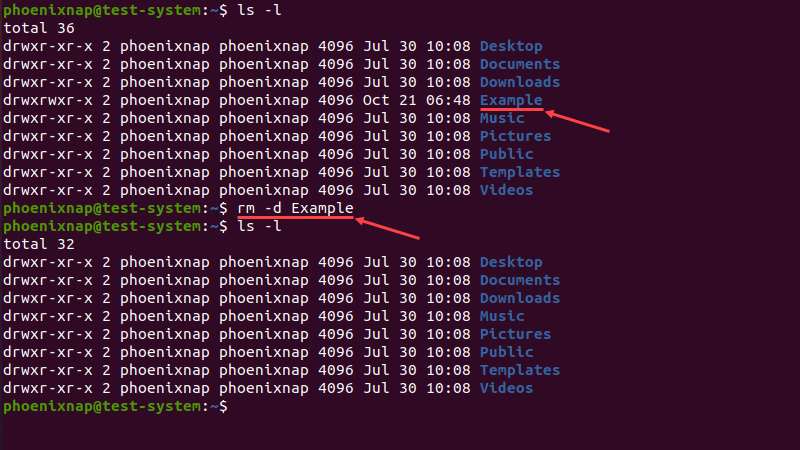
  • rmdir command: Used to delete directories.
  • rm command: Used to delete files.
  • rm -rf command: Used to completely delete a directory and all its contents.

Copying Files and Directories

  • cp command: Used to copy files and directories.
  • cp -r command: Used to copy a directory and all its contents.

Creating Directories

  • mkdir command: Used to create new directories.
  • mkdir -p command: Used to create nested directories.

Deleting Programs

  • apt remove command: Used to delete programs in Ubuntu, Mint, and Pop distributions.
  • apt-get remove command: Used to delete programs in Debian and Kali distributions.
  • pacman -R command: Used to delete programs in Arch distributions.
  • dnf remove command: Used to delete programs in Fedora Linux distributions.
  • zypper remove command: Used to delete programs in OpenSUSE Linux.
  • snap remove command: Used to delete Snap programs.

Important Notes:

  • To use Linux commands, you must have access to the command line (terminal).
  • The Linux command line is case-sensitive.
  • To view more information about each command, you can use the man command.

Benefits of Using Linux

  • Open source: Linux is an open-source operating system, which means its source code is available to everyone and you can download, install, and use it for free.
  • Security: Linux is known as one of the most secure operating systems due to its secure architecture.
  • Stability: Linux is widely used for servers and critical systems due to its high stability.
  • Flexibility: Linux allows you to configure the operating system to meet your specific needs.
  • Free: Linux is available for free and there is no need to pay to use it.

Linux can be an ideal choice for professionals, programmers, system administrators, and anyone looking for a powerful, secure, and flexible operating system.

What is cloud computing in OpenStack?

What is cloud computing in OpenStack?

Cloud computing in simple terms is using servers and storage and processing resources instead of buying and maintaining them physically.

There are three main types of services offered in Cloud environments:

  • IaaS (Infrastructure As A Service): In this type of service, you get the infrastructure you need, such as servers, RAM, hard drives, etc., from a cloud service provider online.
  • SaaS (Software As A Service): In this type of service, instead of installing and running software, you use it online through a web browser.
  • PaaS (Platform As A Service): In this type of service, you get an online software platform to develop and run your applications.

What is OpenStack?

OpenStack is an open-source cloud management platform that allows you to set up and manage your own private or public cloud infrastructure.

Benefits of using OpenStack:

  • Open source: OpenStack is an open-source platform, which means you can download, install, and use it for free.
  • Flexibility: OpenStack allows you to configure your cloud infrastructure to meet your specific needs.
  • Scalability: OpenStack allows you to easily scale your cloud infrastructure to meet growing demand.
  • Security: OpenStack allows you to securely configure your cloud infrastructure.

Main components of OpenStack:

  • Nova: Nova is the core processing component of OpenStack and allows you to create, manage, and delete virtual machines.
  • Swift: Swift is an object storage system that allows you to securely and scalably store your data.
  • Cinder: Cinder is a block storage system that allows you to create and manage storage volumes for your virtual machines.
  • Neutron: Neutron is a virtual network that allows you to create and manage private networks for your virtual machines.
  • Horizon: Horizon is the OpenStack web user interface that allows you to graphically manage your cloud infrastructure.
  • Keystone: Keystone is the OpenStack authentication and authorization system that allows you to manage users and their access to your cloud infrastructure.
  • Glance: Glance is the OpenStack image management system that allows you to store and manage operating system images for your virtual machines.
  • Ceilometer: Ceilometer is the OpenStack metering and billing system that allows you to track your resource consumption.
  • Heat: Heat is the OpenStack orchestration system that allows you to automate complex processes in your cloud infrastructure.
  • Trove: Trove is the OpenStack database service that allows you to create and manage databases online.
  • Sahara: Sahara is the OpenStack data processing service that allows you to set up and manage Hadoop clusters in your cloud infrastructure.
  • Ironic: Ironic is the OpenStack Bare Metal As A Service that allows you to add physical servers to your cloud infrastructure online.
  • Zaqar: Zaqar is the OpenStack messaging and notification service that allows you to communicate between your applications.
support hosting100