Archive

How to install NMAP on Linux?

Network Mapper, abbreviated as NMAP, is an open-source security diagnostic and network inspection tool. This software is designed for fast scanning of large networks, but it also works well on single hosts. NMAP uses raw IP packets in a new way to determine what hosts are available on the network, what services these hosts provide (application name and version), what operating systems they run (what version), what They have filter/firewall package type and many other features. Although NAMP is used for security inspections, many users also use it for routine tasks; Such as network management, service upgrade scheduling management, and hosting or service access time monitoring.


Installing NMAP on Linux

Follow the command below to install NMAP:

dnf install nmap -y

Some useful Nmap commands on Linux:


Ping scan:

nmap -v -sn google.com

IP address scan:

nmap 192.168.116.147

Checking open ports to determine service and version information:

nmap -v -A google.com


nmap -sV google.com

There are other useful commands you can find by checking the NMAP man pages:

man nmap


How to install Apache JMeter on CentOS 8 / RHEL 8?

Apache JMeter is a product of Apache company, an open source program. A Java-based program designed for performance testing and evaluation. JMeter was originally developed for web application testing, but it has expanded its functions and is now used to test other functions as well. This software may be used to test the performance of static and dynamic resources and dynamic web applications. Usually, this software is used to simulate a heavy load on a server, a group of servers, a network or an object so that their strength can be evaluated or their overall performance can be analyzed under various loads.

In this section, you will learn how to install it on CentOS 8 / RHEL 8.


Features of Apache JMeter

  • Some of the features of this software are as follows:
  • The ability to test the performance and load of applications, servers and different protocols such as (FTP, SMTP, TCP, Apache…)
  • Dynamic HTML report generation
  • Extract data in HTML, JSON, XML or any other text format
  • Portable and 100% Java
  • Multi-threading, testing and debugging
  • It has a CLI (Command Line Interface) mode for load testing from any Java compatible operating system
  • Offline storage and analysis / repeat test results


Installing Apache JMeter on CentOS 8 / RHEL 8

  1. Install Java

The first step is to install the Java program. This program is compatible with Java 8 and above:

dnf install java-11-openjdk-devel -y


After installation, you can confirm the Java version with the help of this command:

java -version


  1. Install Apache JMeter

To install, you can download the latest version from its website. Use this command to download:

cd

wget https://downloads.apache.org//jmeter/binaries/apache-jmeter-5.4.1.tgz

ls


Now open the downloaded package:

tar zxvf apache-jmeter-5.4.1.tgz

ls


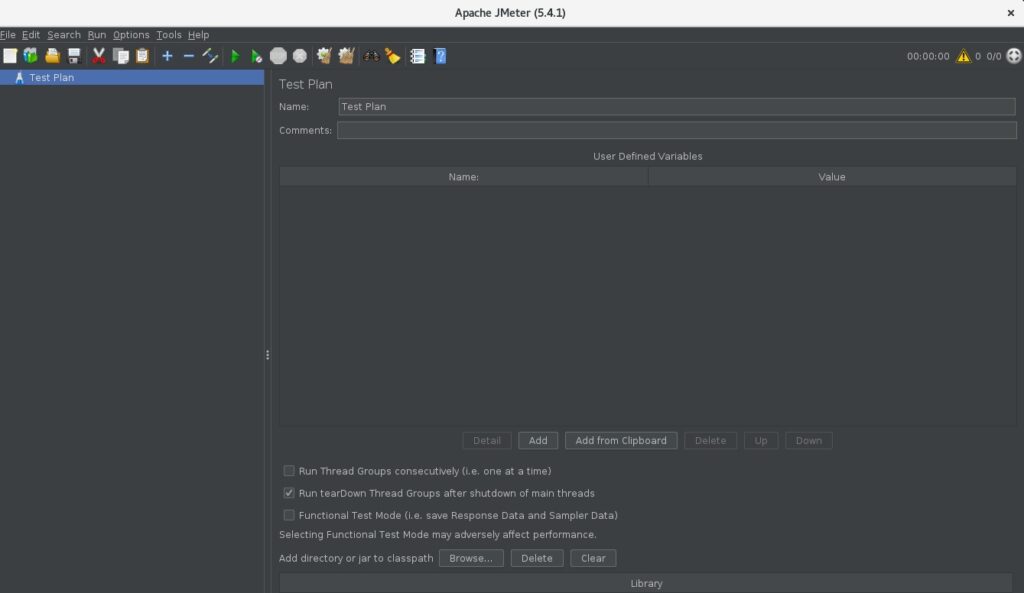
After opening, there is no need to install. Just go to the apache-jmeter-5.4.1/bin directory and enable Jmeter with this command:

cd apache-jmeter-5.4.1/bin/

./jmeter


The installation is finished. Now you can run JMeter and analyze and evaluate the performance of various services.

Increasing Linux server security

What are the solutions to increase the security of the Linux server? A Linux server is a server on which one of the distributions of the Linux operating system is installed. This server can be considered a type of computer always connected to the Internet, which has a special type of software and hardware. If you also use a Linux server, increasing its security is definitely one of your concerns. Although one of the main reasons for people’s acceptance of Linux servers is their high security, there are solutions with the help of which you can improve this security to the maximum extent.

But why is security so important in Linux servers? Linux server can be used for web hosting, mail server, file storage, etc. That is why it is very important to talk about high security in these servers. One of the advantages of Linux is its open source. Therefore, its security bugs are easily identified and fixed. Considering that hackers may always be able to find a way to infiltrate your server and system, it is essential to strengthen the security layers of your Linux server in several ways. In this article, we have mentioned 13 of the most practical possible solutions to increase the security of the Linux server.

Solutions to increase Linux server security

In what ways can we improve the security of the Linux server? Although one of the main features of Linux is its high security, but for your peace of mind, you have the possibility to adjust the security of this server according to your needs through solutions. Since hackers can always find a way, it is not bad to know these solutions and by doing them, try to improve the security of your Linux server to the maximum extent. In the following, we will introduce 13 practical solutions.

1. Enable open_basedir

One of the ways to increase the security of this server is to activate one of the php services called open_basedir. This system is a kind of security feature in PHP that prevents hackers. With the help of open_basedir, it is possible to make the access of a user through php only limited to the same user. In other words, when a hacker succeeds in penetrating a part of the server, if this feature is enabled, the hacker’s access is limited to that part and he cannot access other parts of the server.

2. Taking help from safe_mode

You are probably familiar with the Safe Mode status on your mobile phone. But this feature is not specific to mobile phones and is also available for operating systems. This mode is designed to remove malicious programs, viruses, find software errors, restore operating system settings, etc. In simpler words, it can be said that Safe Mode is a state of the operating system in which, if it is active, only essential files can be executed.

Enabling safe mode prevents malicious programs from running. If a malicious program is installed on your Linux server, it will run every time Windows boots. Most viruses and malicious programs that infiltrate systems with the intention of hacking servers are designed in such a way that they can disable or remove antiviruses. Therefore, if a malicious program has entered the server, the best solution to prevent it from running is to set Windows to safe mode.


3. Disabling remote code execution

One of the methods that hackers use to break into systems is to execute code remotely in the desktop service, which is called Remote Desktop Services. A hacker can run any code they want on your system. For example, it can install its own malicious programs on the server, and in this way, it can learn about the server’s data and even change them. To increase the security of the Linux server, it is better to disable Remote Desktop Services. In general, deactivating services that do not work for the system increases its security.

4. Disable display_error

Display error is a type of error report in php that some programmers activate with the intention of viewing and being informed of php errors. Due to security issues, it is better to disable this service because its activation makes it easier for unauthorized attackers to penetrate the server. Therefore, if you are looking for a way to improve the security of your Linux server, we recommend that you disable this error report and use another solution to view php errors.

5. Input size limitation

One of the ways to increase Linux security and prevent web attacks is to limit the input size. But what does limiting the input size mean? As you probably know, in the php language and in the post method, the data in the HTTP request is hidden in the header.

Sending malicious codes in parts of the site that takes input from the user on the post method is one of the hackers’ methods to penetrate the system. In such a situation, if you limit the input size in the config file, you can prevent attackers from sending these malicious codes.

6. Resource limitation

DOS attacks, which are shortened to Denial of Service attack, are known as Denial of Service attacks. These attacks are carried out by attackers or hackers. The purpose of these attacks is to temporarily or permanently suspend or interrupt the services of the servers hosting a site. One of the solutions that can be used to protect against these attacks to some extent and ensure the security of the Linux server is limiting resources.

7. Disabling some functions

Another way to prevent web attacks is to disable some functions. If you are using shared servers, it is better to close the functions that are threatening to the Linux server. Some of these functions are:

  • curl_multi_info_read
  • curl_multi_init
  • curl_multi_remove_handle
  • curl_multi_select

These functions are located in a file called php.ini.

8. Using the magic_quotes_gps function

Inputs that are sent from the user side to the server may be a security bug for the server for various reasons. Therefore, one of the things that can be done to increase the security of the Linux server is to use the magicquotesgpc function. This function provides the programmer or site developers with the ability to secure user-side inputs to the server to a great extent. To activate and use this function, you must access the php.ini file.


9. Disable expose_php

One of the ways to prevent attackers and hackers from infiltrating the server is to prevent them from accessing our server facilities. But how can this be done? Note that whenever php starts, it adds a message containing its version number to the server header. In order to hide this data from hackers, you can set the expose_PHP variable to off. By disabling this feature, the data and web server facilities are not easily available to hackers.

10. Installation of CSF firewall

As another way to increase Linux server security, you can install CSF firewalls, which are also known as firewalls. This system can be considered as one of the best server security services that have been very successful in its kind so far. If you are looking for one of the strictest security elements to improve server security, be sure to install CSF Firewall. As the name suggests, this system works exactly like a firewall.

In other words, after installation, at the entrance of a server, it carefully checks all incoming requests to it. You can enable any security settings you want on the firewall. After that, if any of the incoming requests to the server contradicts the information and settings registered in the firewall, the requests are deleted and prevented from being sent to the server. A firewall is powerful enough to filter and process thousands of gigabytes of data in just a fraction of a second.

11. Installation and configuration of CLAMAV antivirus

If you are looking for one of the best antivirus for Linux operating system, install CLAMAV Antivirus, which has the ability to detect a large number of viruses at the same time. Another advantage of this antivirus is that it is free. In addition to this, the database of this antivirus can be updated automatically. Despite the powerful tools such as the scanner provided by this antivirus, you no longer need to use graphical environments to scan your server; Rather, you can scan the server with the help of this antivirus’s own scanner. Installing CLAMAV antivirus is recommended as one of the ways to increase Linux server security.


12. Installing the ModSecurity module

ModSecurity module is a firewall that is installed on the hosting servers. Along with other software and hardware firewalls that you install to keep your server secure, adding this module can also act as a double layer of security. This module is able to control various attacks on the server to a great extent. Note that installing the security mode module alone is not enough to maintain the security of the server, but this module should be used along with other security firewalls to increase the site’s security level.

One of the positive features of this module is its programming power. The security mode can identify and block things that have already damaged the security of the site. Among the applications of this security module, the following can be mentioned:

  • Ability to detect malicious bots and block them
  • Checking any requests sent to the site, such as membership requests from the user
  • Managing site traffic and checking them to ensure the absence of any security bugs
  • Preventing the uploading of some files and managing any uploaded files on the site
  • Managing the execution of commands and preventing the execution of malicious commands

13. Install CXS

As the last way to increase the security of the Linux server in this article, we should mention the installation of CSX. ConfigServer eXploit Scanner is a tool that can scan all files uploaded to the server. You can use this tool to prevent unauthorized attackers from exploiting the site and Linux server. The following are the positive features of this tool that help to maintain the security of the Linux server:

  • CSX tool is able to block loading of suspicious PHP and Perl scripts. These downloads are usually done with the purpose of sending spam or malicious attacks.
  • It has the ability to identify uploaded roots in user accounts.
  • It is able to increase the efficiency and scalability of the server.

How to configure Static IP address in Ubuntu 20.04

Typically, in most network configurations, IP addresses are dynamically assigned by a DHCP server. Static IP address setting may be required in various situations such as port forwarding configuration or media server implementation. Join us in this tutorial to introduce you to how to configure Static IP address in Ubuntu 20.04.

Static IP address configuration using DHCP:

The easiest and most recommended way to assign a static IP address to a device on your LAN is to configure static DHCP on your router. Static DHCP or DHCP reservation is a feature found on most routers that causes the DHCP server to automatically assign an IP address to a dedicated network device each time the device requests an address from the DHCP server. It works by assigning a static IP to a device’s unique MAC address. DHCP reservation configuration steps vary from router to router.

Netplan:

Ubuntu 17.10 and later versions use Netplan as the default network management tool. Previous versions of Ubuntu used ifconfig and its configuration file /etc/network/interfaces for network configuration. Netplan configuration files are written with YAML command with .yaml file extension. To configure a network card with Netplan, you need to create a YAML description for the network card, and Netplan will create the required configuration files for the selected provider tool. Netplan supports two providers, NetworkManager and Systemd-networkd. NetworkManager is mostly used on desktop machines, while Systemd-networkd is used on non-GUI servers.

Static IP address configuration on Ubuntu server:

In Ubuntu 20.04, the system identifies NICs using “predictable NIC names”. The first step to setting up a static IP address is to identify the name of the Ethernet card you want to configure. To do this, use the ip link command:

ip link

The command displays a list of all available network cards. In this example, the user card name is ens3:

۱: lo: <LOOPBACK,UP,LOWER_UP> mtu 65536 qdisc noqueue state UNKNOWN mode DEFAULT group default qlen 1000      link/loopback 00:00:00:00:00:00 brd 00:00:00:00:00:00  ۲: ens3: <BROADCAST,MULTICAST,UP,LOWER_UP> mtu 1500 qdisc fq_codel state UP mode DEFAULT group default qlen 1000      link/ether 08:00:27:6c:13:63 brd ff:ff:ff:ff:ff:ff

Netplan configuration files are stored in /etc/netplan directory. You will probably find one or more YAML files in this directory. The file name may be different in different systems. Usually the file name is 01-netcfg.yaml, 50-cloud-init.yaml or NN_interfaceName.yaml, but it may be different on your system. If your Ubuntu cloud instance has cloud-init, you need to disable it. To do this, create the following file:

sudo nano /etc/cloud/cloud.cfg.d/99-disable-network-config.cfg
network: {config: disabled}

To assign a static IP address on the network card, open the YAML configuration file with your text editor:

sudo nano /etc/netplan/01-netcfg.yaml
network:    version: 2    renderer: networkd    ethernets:      ens3:        dhcp4: yes

Before changing the config, let’s briefly explain the code.

Each Netplan Yaml file starts with a network key that contains at least two required elements. The first required element is the version of the network config template and the second is the device type. The device type can be ethernets, bonds, bridges, or vlans. Under Device type (ethernets), you can specify one or more network interfaces. In this example, we have only one ens3 interface configured to obtain an IP address from a DHCP4 server: dhcp4:yes.

To assign a static IP address to the ens3 interface, edit the file as follows:

  • Set DHCP to dhcp4:no.
  • Specify a static IP address. Under Addresses: you can add one or more IPv4 or IPv6 IP addresses that will be assigned to the network interface.
  • Specify the gateway.
  • Under nameservers, set the nameservers IP addresses.
network:  version: 2  renderer: networkd  ethernets:  ens3:  dhcp4: no  addresses:  - ۱۹۲٫۱۶۸٫۱۲۱٫۲۲۱/۲۴  gateway4: 192.168.121.1  nameservers:  addresses: [8.8.8.8, 1.1.1.1]

When editing Yaml files, make sure you follow YAML code indentation standards. If it is not true, the changes will not be applied. After finishing the work, save the file and apply the changes by running the following command:

sudo netplan apply
Confirm the changes by typing the following commands:
ip addr show dev ens3
۲: ens3: <BROADCAST,MULTICAST,UP,LOWER_UP> mtu 1500 qdisc mq state UP group default qlen 1000      link/ether 08:00:27:6c:13:63 brd ff:ff:ff:ff:ff:ff      inet 192.168.121.221/24 brd 192.168.121.255 scope global dynamic ens3         valid_lft 3575sec preferred_lft 3575sec      inet6 fe80::5054:ff:feb0:f500/64 scope link          valid_lft forever preferred_lft forever

You have assigned a static IP to your Ubuntu server.

Fixed IP address configuration in Ubuntu desktop:

Setting up a static IP address on Ubuntu desktops requires no technical knowledge.

On the Activities page, search for “settings” and click on the icon. This will open the GNOME Settings window. Click on Network or Wi-Fi depending on the interface you want to change. Click the cog icon next to the interface name to open interface settings. In the “IPV4” tab, select the “Manual” method and enter your static IP address, Netmask and Gateway. When you are done, click the “Apply” button.

ip addr

The output shows the IP address of the network card:

...  ۲: wlp1s0: <BROADCAST,MULTICAST,UP,LOWER_UP> mtu 1500 qdisc noqueue state UP group default qlen 1000      link/ether 50:5b:c2:d8:59:7d brd ff:ff:ff:ff:ff:ff      inet 192.168.121.221/24 brd 192.168.31.255 scope global dynamic noprefixroute wlp1s0         valid_lft 38963sec preferred_lft 38963sec      inet6 fe80::45e3:7bc:a029:664/64 scope link noprefixroute 

Conclusion :

We have shown you how to configure a static IP address in Ubuntu 20.04.

Setting up a permanent DNS address server on Ubuntu and Debian Linux

In this tutorial, we will look at how to install and use the resolvconf program to set a permanent DNS address server in the /etc/resolv.conf file on Debian and Ubuntu Linux distributions. Stay with us.

/etc/resolv.conf is the main configuration file for the DNS name resolver library. A resolver is actually a set of functions in the C library that provides access to the Internet’s Domain Naming System , or DNS. These functions are set to check the entries in the /etc/hosts file or some DNS name servers or to use the network information database service or NIC.

On modern Linux-based systems that use the system management tool and systemd service, DNS or name resolution services are provided to help local applications using the systemd-resolved service. By default, this service has four different modes to manage domain name analysis. Also, by default, the systemd DNS stub file at /run/systemd/resolve/stub-resolv.conf is used.

The file contains the local address 127.0.0.53 as the only DNS server. This address refers to the /etc/resolv.conf file, which is used by the system to add server titles.

If you run the following ls command for /etc/resolv.conf, you will see that this file is a symlink to the /run/systemd/resolve/stub-resolv.conf file.

1
$ ls -l /etc/resolv.conf
1
lrwxrwxrwx 1 root root 39 Feb 15  2019 /etc/resolv.conf -> ../run/systemd/resolve/stub-resolv.conf

Of course, considering that /etc/resolv.conf is indirectly managed by the systemd-resolved service and in some cases is under the control of the network service (by initscripts or NetworkManager), any manual changes by the user cannot be permanent. or stored for a certain period of time.

Why should we edit the /etc/resolv.conf file?

The main reason for this is that the system’s DNS settings are usually not set correctly. You may also prefer to use your own server titles. The following cat command will show the default server address in the /etc/resolv.conf file on the sample Ubuntu system.

1
$ cat /etc/resolv.conf

Check DNS name servers

Here, when local applications such as the APT package management tool try to access FQDNs on the local network, the result will contain the error message “Temporary failure in name resolution” as shown in the image below.

Temporary problem in DNS server title parsing

The same thing happens when using the ping command.

1
$ ping google.com

Temporary problem in name parsing

Therefore, when a user tries to manually configure DNS address servers, these changes will not be permanent. In fact, these settings will be lost after a single system restart. To overcome this problem, you can install the reolvconf tool so that you can apply the changes permanently.

In order to install the resolvconf package, you must first manually configure all DNS address servers in the /etc/resolv.conf file. This way you can access FQDMs of Ubuntu source servers on the Internet.

1
2
3
nameserver 8.8.4.4
nameserver 8.8.8.8

Installing resolvconf on Ubuntu and Debian

First, we update the system software packages. Then we will install resolvconf from official sources using the following commands.

1
2
3
$ sudo apt update
$ sudo apt install resolvconf

When the resolvconf tool installation is finished, systemd will automatically run and enable resolvconf.service. You can use the following command to check the status of this service.

1
$ sudo systemctl status resolvconf.service

If this service does not start and is not activated automatically for any reason, you can run and activate it using the following commands.

1
2
3
4
5
$ sudo systemctl start resolvconf.service
$ sudo systemctl enable resolvconf.service
$ sudo systemctl status resolvconf.service

Checking the service status of the resolvconf tool

Setting permanent DNS server address in Ubuntu and Debian

Then it’s time to set the configuration file /etc/resolvconf/resolv.conf.d/head.

1
$ sudo nano /etc/resolvconf/resolv.conf.d/head

Add the following in it.

1
2
3
nameserver 8.8.8.8
nameserver 8.8.4.4

Setting permanent DNS address server in Resolvconf

Now save the changes and restart the resolvconf.service. You can also reboot the system.

1
$ sudo systemctl start resolvconf.service

Now by checking the /etc/resolv.conf file you will notice that the imported title servers are permanently stored in it. From now on, there will be no problem in resolving the DNS server name in your system.

Permanent DNS address servers

We hope that this article about setting up a permanent DNS address server in Ubuntu and Debian has been of interest to you. Be sure to follow the future contents of hosting100’s blog in this field

How to install VirtualBox on CentOS 8

VirtualBox  is an open source virtualization platform. It supports a number of guest operating systems, including Linux and Windows, and allows you to run multiple virtual machines at the same time. Join us in this tutorial to introduce you to how to install VirtualBox on CentOS 8.

Installing VirtualBox on CentOS 8:

1. Update your system:

It’s recommended to keep your system up-to-date before installing new software. Use the following command:

sudo dnf update

2. Add the repository URL:

Create a new file named virtualbox.repo using your preferred text editor (e.g., nano) and add the following lines:

[VirtualBox]
name = Oracle VirtualBox Repository
baseurl = https://download.virtualbox.org/virtualbox/rpm/el/8
enabled = 1
gpgkey = https://www.virtualbox.org/download/pubkey/0E6C-43CF-874D-BF85-1ED6-06BD-6C46D277DFBA.asc

Save and close the file.

3. Install VirtualBox:

sudo dnf config-manager --add-repo=https://download.virtualbox.org/virtualbox/rpm/el/virtualbox.repo

Step 2: At the time of writing this article, the latest stable version of VirtualBox is version 6.0.x. To install the VirtualBox-6.0 package, run the following command:

sudo yum install VirtualBox-6.0

During installation, you will be prompted to import the GPG repository. Type y and press Enter. At this point, 

4. Start and enable VirtualBox service:

While VirtualBox doesn’t require a service to run manually, it’s helpful to set it to start automatically at boot:

sudo systemctl start virtualbox
sudo systemctl enable virtualbox

5. Verify the installation:

You can verify the installation by running:

vboxmanage -v

This should display the installed VirtualBox version.

Installing the VirtualBox add-on package:

The VirtualBox add-on package provides several useful features for guest devices such as virtual USB 2.0 and 3.0 devices, RDP support, image encryption, and more. Use wget to download the add-on package from the VirtualBox download page:

wget https://download.virtualbox.org/virtualbox/6.0.14/Oracle_VM_VirtualBox_Extension_Pack-6.0.14.vbox-extpack

After downloading the file, import it using the following command:

sudo VBoxManage extpack install Oracle_VM_VirtualBox_Extension_Pack-6.0.14.vbox-extpack

You will be presented with an Oracle license and asked to accept the terms and conditions.

Do you agree to these license terms and conditions (y/n)?

Type y and press Enter. Once the installation is complete, you will see the following output:

۰%...۱۰%...۲۰%...۳۰%...۴۰%...۵۰%...۶۰%...۷۰%...۸۰%...۹۰%...۱۰۰%  Successfully installed "Oracle VM Virtu

Replace <username> with your actual username.

Start VirtualBox:

Now that VirtualBox is installed on your CentOS machine, you can start it from the command line by typing VirtualBox or by clicking on the VirtualBox icon (Activities -> Oracle VM VirtualBox). When VirtualBox starts up for the first time, a window like the one below should appear:

Conclusion :

Installing VirtualBox on CentOS 8 is a simple task. All you have to do is enable the Oracle repository and install the VirtualBox package with dnf.

How to install MariaDB on CentOS 8

MariaDB is a free and open-source relational database management system (RDBMS). It’s designed to be a drop-in replacement for MySQL, another popular RDBMS. Here’s a breakdown of what that means:

  • Relational Database: MariaDB stores data in a structured format with tables and relationships between them. This makes it efficient for organizing and querying large amounts of data.
  • Open-Source: The source code for MariaDB is freely available, allowing anyone to inspect, modify, and contribute to its development. This fosters a collaborative community and ensures transparency.
  • MySQL Replacement: MariaDB was created by some of the original developers of MySQL. It’s highly compatible with MySQL, meaning applications designed for MySQL can often run seamlessly on MariaDB.

Here are some key features of MariaDB:

  • Performance: MariaDB is known for its good performance and scalability, making it suitable for various applications.
  • Stability: It has a reputation for being stable and reliable.
  • Security: MariaDB offers various security features to protect your data, like user authentication and encryption.

Overall, MariaDB is a powerful and versatile option for anyone needing a free and open-source relational database solution.

Here’s how to install MariaDB on CentOS 8:

1. Update your system:

Before you begin, ensure your system is up-to-date using the following command:

sudo dnf update

2. Install MariaDB:

Use the following command to install MariaDB and its dependencies:

sudo dnf install @mariadb

3. Start and enable MariaDB service:

Enable and start the MariaDB service with these commands:

sudo systemctl start mariadb
sudo systemctl enable mariadb

4. Secure MariaDB:

MariaDB security:

The MariaDB server package performs several security-related operations and sets the master password with a script called mysql_secure_installation. Verify the script by typing the following command:

sudo mysql_secure_installation

You will be prompted to set a password for the MariaDB root user. After doing this, the script will also ask you to remove the anonymous user, restrict root access to the local machine, and remove the test database. You must answer “yes” “Y” to all questions. You have installed and secured MariaDB on your CentOS server and are ready to use it.

5. Verify the installation:

To confirm MariaDB is installed and running correctly, use the following command:

sudo systemctl status mariadb

The output should show the service is “active (running)”.

6. Connect to MariaDB:

Finally, you can connect to the MariaDB shell as the root user using:

sudo mysql -u root -p

When prompted for the password, enter the one you set in step 4.

Additional Tips:

  • If you don’t want to use the root user, create a new user with appropriate privileges for daily usage.
  • Edit the /etc/my.cnf file for further MariaDB configuration.

Conclusion :

In this tutorial, we showed you how to install and secure MariaDB on CentOS 8 and how to connect to the MariaDB server from the command line. Now that your MariaDB server is up and running, you can connect to the MariaDB shell and start creating new databases and users.
support hosting100