Archive

Setting up a permanent DNS address server on Ubuntu and Debian Linux

In this tutorial, we will look at how to install and use the resolvconf program to set a permanent DNS address server in the /etc/resolv.conf file on Debian and Ubuntu Linux distributions. Stay with us.

/etc/resolv.conf is the main configuration file for the DNS name resolver library. A resolver is actually a set of functions in the C library that provides access to the Internet’s Domain Naming System , or DNS. These functions are set to check the entries in the /etc/hosts file or some DNS name servers or to use the network information database service or NIC.

On modern Linux-based systems that use the system management tool and systemd service, DNS or name resolution services are provided to help local applications using the systemd-resolved service. By default, this service has four different modes to manage domain name analysis. Also, by default, the systemd DNS stub file at /run/systemd/resolve/stub-resolv.conf is used.

The file contains the local address 127.0.0.53 as the only DNS server. This address refers to the /etc/resolv.conf file, which is used by the system to add server titles.

If you run the following ls command for /etc/resolv.conf, you will see that this file is a symlink to the /run/systemd/resolve/stub-resolv.conf file.

1
$ ls -l /etc/resolv.conf
1
lrwxrwxrwx 1 root root 39 Feb 15  2019 /etc/resolv.conf -> ../run/systemd/resolve/stub-resolv.conf

Of course, considering that /etc/resolv.conf is indirectly managed by the systemd-resolved service and in some cases is under the control of the network service (by initscripts or NetworkManager), any manual changes by the user cannot be permanent. or stored for a certain period of time.

Why should we edit the /etc/resolv.conf file?

The main reason for this is that the system’s DNS settings are usually not set correctly. You may also prefer to use your own server titles. The following cat command will show the default server address in the /etc/resolv.conf file on the sample Ubuntu system.

1
$ cat /etc/resolv.conf

Check DNS name servers

Here, when local applications such as the APT package management tool try to access FQDNs on the local network, the result will contain the error message “Temporary failure in name resolution” as shown in the image below.

Temporary problem in DNS server title parsing

The same thing happens when using the ping command.

1
$ ping google.com

Temporary problem in name parsing

Therefore, when a user tries to manually configure DNS address servers, these changes will not be permanent. In fact, these settings will be lost after a single system restart. To overcome this problem, you can install the reolvconf tool so that you can apply the changes permanently.

In order to install the resolvconf package, you must first manually configure all DNS address servers in the /etc/resolv.conf file. This way you can access FQDMs of Ubuntu source servers on the Internet.

1
2
3
nameserver 8.8.4.4
nameserver 8.8.8.8

Installing resolvconf on Ubuntu and Debian

First, we update the system software packages. Then we will install resolvconf from official sources using the following commands.

1
2
3
$ sudo apt update
$ sudo apt install resolvconf

When the resolvconf tool installation is finished, systemd will automatically run and enable resolvconf.service. You can use the following command to check the status of this service.

1
$ sudo systemctl status resolvconf.service

If this service does not start and is not activated automatically for any reason, you can run and activate it using the following commands.

1
2
3
4
5
$ sudo systemctl start resolvconf.service
$ sudo systemctl enable resolvconf.service
$ sudo systemctl status resolvconf.service

Checking the service status of the resolvconf tool

Setting permanent DNS server address in Ubuntu and Debian

Then it’s time to set the configuration file /etc/resolvconf/resolv.conf.d/head.

1
$ sudo nano /etc/resolvconf/resolv.conf.d/head

Add the following in it.

1
2
3
nameserver 8.8.8.8
nameserver 8.8.4.4

Setting permanent DNS address server in Resolvconf

Now save the changes and restart the resolvconf.service. You can also reboot the system.

1
$ sudo systemctl start resolvconf.service

Now by checking the /etc/resolv.conf file you will notice that the imported title servers are permanently stored in it. From now on, there will be no problem in resolving the DNS server name in your system.

Permanent DNS address servers

We hope that this article about setting up a permanent DNS address server in Ubuntu and Debian has been of interest to you. Be sure to follow the future contents of hosting100’s blog in this field

Easy Installation of Python 3.12 on Ubuntu 22.04

Introduction:

Python is a powerful and popular programming language known for its simplicity, readability, and wide range of applications. This tutorial provides two straightforward methods for installing Python 3.12 on Ubuntu 22.04.

Installation Steps:

Method 1: Installing Python 3.12 with APT

  1. System Update:
Bash
sudo apt update && sudo apt upgrade -y
  1. Add PPA Repository:
Bash
sudo add-apt-repository ppa:deadsnakes/ppa
sudo apt update
  1. Install Python 3.12:
Bash
sudo apt install python3.12
  1. Verify Installation:
Bash
python3.12 --version

Method 2: Installing Python 3.12 from Source

Note: This method is recommended for more experienced users.

  1. Install Prerequisites:
Bash
sudo apt install build-essential zlib1g-dev libncurses5-dev libgdbm-dev libnss3-dev libssl-dev libreadline-dev libffi-dev libsqlite3-dev wget libbz2-dev
  1. Download Source Code:

Download the latest Python version from https://www.python.org/downloads/.

  1. Extract and Configure:
Bash
tar -xf Python-3.12.0.tgz
cd Python-3.12.0
./configure --enable-optimizations
  1. Compile and Install:
Bash
make -j $(nproc)
sudo make altinstall
  1. Verify Installation:
Bash
python3.12 --version

Installing Python Modules:

To install Python libraries (like numpy), use pip:

Bash
pip3.12 install numpy

Setting Python 3.12 as Default:

Bash
sudo update-alternatives --install /usr/bin/python3 python3 /usr/bin/python3.10 1
sudo update-alternatives --install /usr/bin/python3 python3 /usr/local/bin/python3.12 2
sudo update-alternatives --config python3

Tips:

  • In Method 1, Python 3.12 will automatically update.
  • In Method 2, you’ll need to repeat the compilation and installation steps to update Python.
  • For more information, refer to the official Python documentation: https://www.python.org/downloads/


Solving the problem of remote desktop not connecting

In the future, stay with us in hosting100 so that we can discuss this issue in detail and solve the problem that many of you friends and

How many times have those who use the service faced the problem of not being able to connect to the server and with the error:

an authentication error has occurred. the function requested is not supported.

loved ones are dealing with.

Of course, there is nothing to worry about, and there is no problem on the server side, and this error is only due to the Windows update. To fix this, you only need to enter a command in the cmd of your system, which we will discuss further.

To follow up on this matter, search for the word cmd and right click on it and click on the run as administrator option and then execute the following command and login with the same server password.

reg add "HKLM\Software\Microsoft\Windows\CurrentVersion\Policies\System\CredSSP\Parameters" /f /v AllowEncryptionOracle /t REG_DWORD /d 2

We hope that this article has been useful for you and your friends and regular companions of hosting 100 and that you have benefited from it. We are waiting for your comments at the end of this article in the comments section.

How to install VirtualBox on CentOS 8

VirtualBox  is an open source virtualization platform. It supports a number of guest operating systems, including Linux and Windows, and allows you to run multiple virtual machines at the same time. Join us in this tutorial to introduce you to how to install VirtualBox on CentOS 8.

Installing VirtualBox on CentOS 8:

1. Update your system:

It’s recommended to keep your system up-to-date before installing new software. Use the following command:

sudo dnf update

2. Add the repository URL:

Create a new file named virtualbox.repo using your preferred text editor (e.g., nano) and add the following lines:

[VirtualBox]
name = Oracle VirtualBox Repository
baseurl = https://download.virtualbox.org/virtualbox/rpm/el/8
enabled = 1
gpgkey = https://www.virtualbox.org/download/pubkey/0E6C-43CF-874D-BF85-1ED6-06BD-6C46D277DFBA.asc

Save and close the file.

3. Install VirtualBox:

sudo dnf config-manager --add-repo=https://download.virtualbox.org/virtualbox/rpm/el/virtualbox.repo

Step 2: At the time of writing this article, the latest stable version of VirtualBox is version 6.0.x. To install the VirtualBox-6.0 package, run the following command:

sudo yum install VirtualBox-6.0

During installation, you will be prompted to import the GPG repository. Type y and press Enter. At this point, 

4. Start and enable VirtualBox service:

While VirtualBox doesn’t require a service to run manually, it’s helpful to set it to start automatically at boot:

sudo systemctl start virtualbox
sudo systemctl enable virtualbox

5. Verify the installation:

You can verify the installation by running:

vboxmanage -v

This should display the installed VirtualBox version.

Installing the VirtualBox add-on package:

The VirtualBox add-on package provides several useful features for guest devices such as virtual USB 2.0 and 3.0 devices, RDP support, image encryption, and more. Use wget to download the add-on package from the VirtualBox download page:

wget https://download.virtualbox.org/virtualbox/6.0.14/Oracle_VM_VirtualBox_Extension_Pack-6.0.14.vbox-extpack

After downloading the file, import it using the following command:

sudo VBoxManage extpack install Oracle_VM_VirtualBox_Extension_Pack-6.0.14.vbox-extpack

You will be presented with an Oracle license and asked to accept the terms and conditions.

Do you agree to these license terms and conditions (y/n)?

Type y and press Enter. Once the installation is complete, you will see the following output:

۰%...۱۰%...۲۰%...۳۰%...۴۰%...۵۰%...۶۰%...۷۰%...۸۰%...۹۰%...۱۰۰%  Successfully installed "Oracle VM Virtu

Replace <username> with your actual username.

Start VirtualBox:

Now that VirtualBox is installed on your CentOS machine, you can start it from the command line by typing VirtualBox or by clicking on the VirtualBox icon (Activities -> Oracle VM VirtualBox). When VirtualBox starts up for the first time, a window like the one below should appear:

Conclusion :

Installing VirtualBox on CentOS 8 is a simple task. All you have to do is enable the Oracle repository and install the VirtualBox package with dnf.

How to install MariaDB on CentOS 8

MariaDB is a free and open-source relational database management system (RDBMS). It’s designed to be a drop-in replacement for MySQL, another popular RDBMS. Here’s a breakdown of what that means:

  • Relational Database: MariaDB stores data in a structured format with tables and relationships between them. This makes it efficient for organizing and querying large amounts of data.
  • Open-Source: The source code for MariaDB is freely available, allowing anyone to inspect, modify, and contribute to its development. This fosters a collaborative community and ensures transparency.
  • MySQL Replacement: MariaDB was created by some of the original developers of MySQL. It’s highly compatible with MySQL, meaning applications designed for MySQL can often run seamlessly on MariaDB.

Here are some key features of MariaDB:

  • Performance: MariaDB is known for its good performance and scalability, making it suitable for various applications.
  • Stability: It has a reputation for being stable and reliable.
  • Security: MariaDB offers various security features to protect your data, like user authentication and encryption.

Overall, MariaDB is a powerful and versatile option for anyone needing a free and open-source relational database solution.

Here’s how to install MariaDB on CentOS 8:

1. Update your system:

Before you begin, ensure your system is up-to-date using the following command:

sudo dnf update

2. Install MariaDB:

Use the following command to install MariaDB and its dependencies:

sudo dnf install @mariadb

3. Start and enable MariaDB service:

Enable and start the MariaDB service with these commands:

sudo systemctl start mariadb
sudo systemctl enable mariadb

4. Secure MariaDB:

MariaDB security:

The MariaDB server package performs several security-related operations and sets the master password with a script called mysql_secure_installation. Verify the script by typing the following command:

sudo mysql_secure_installation

You will be prompted to set a password for the MariaDB root user. After doing this, the script will also ask you to remove the anonymous user, restrict root access to the local machine, and remove the test database. You must answer “yes” “Y” to all questions. You have installed and secured MariaDB on your CentOS server and are ready to use it.

5. Verify the installation:

To confirm MariaDB is installed and running correctly, use the following command:

sudo systemctl status mariadb

The output should show the service is “active (running)”.

6. Connect to MariaDB:

Finally, you can connect to the MariaDB shell as the root user using:

sudo mysql -u root -p

When prompted for the password, enter the one you set in step 4.

Additional Tips:

  • If you don’t want to use the root user, create a new user with appropriate privileges for daily usage.
  • Edit the /etc/my.cnf file for further MariaDB configuration.

Conclusion :

In this tutorial, we showed you how to install and secure MariaDB on CentOS 8 and how to connect to the MariaDB server from the command line. Now that your MariaDB server is up and running, you can connect to the MariaDB shell and start creating new databases and users.

Advantages of virtual server hosting (VPS)

What is virtual server hosting or VPS?

VPS stands for Virtual Private Server. This may not mean much to you, but it will make some sense.

The main feature of virtual server hosting or VPS is the virtual aspect. This technology relies on virtualization technology that creates a virtual server on top of an existing physical server. So, you have a single physical server and this is split into multiple virtual servers.

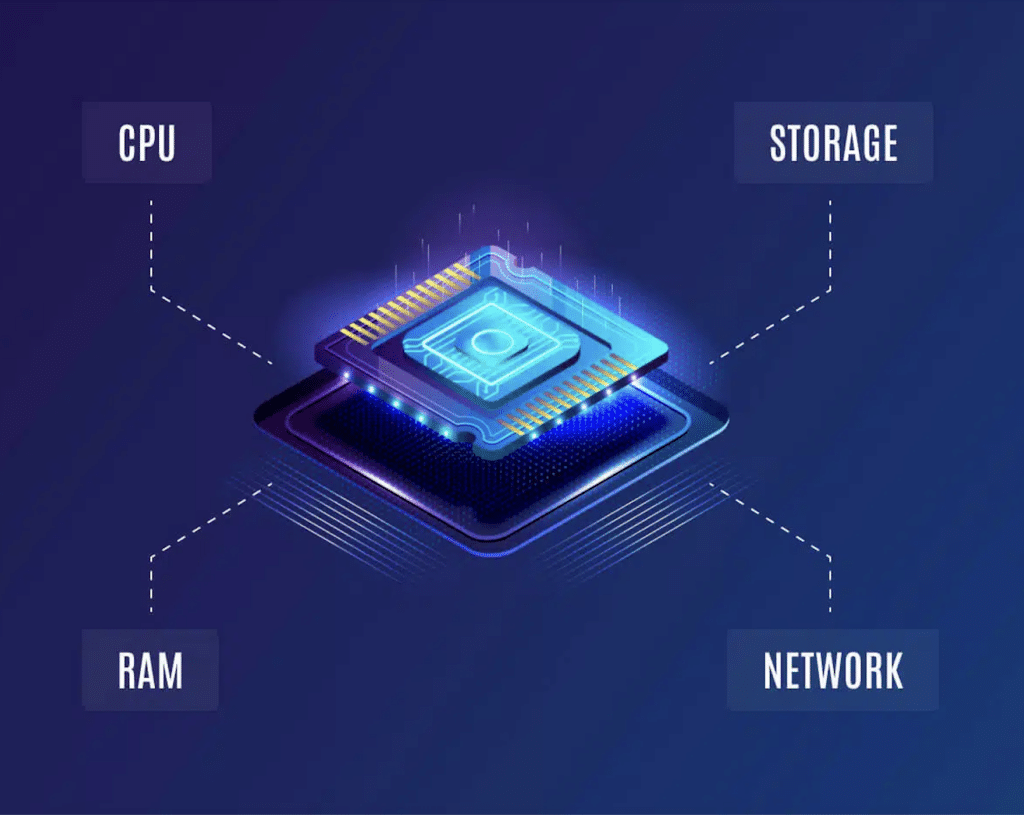
These virtual servers work completely separately from each other. All of them have their own dedicated server resources. So, you don’t have to share your RAM, CPU or hard drive with other websites, even if you are still on the same physical server.

Contrast this with shared hosting, where you can share a physical server with thousands of other websites. In addition, there is a possibility that other websites can negatively affect your site when using a shared server.

Basically, a VPS works like a dedicated server. But, it is much cheaper, which makes it more accessible to different types of website owners.

You can compare VPS hosting to living in a high-rise apartment complex.

The general structure of the building is shared between each apartment in the building. But, each apartment is completely separated from each other. You can customize your space however you see fit, and you won’t have a problem with other apartments encroaching on your space.

In this scenario, the physical server you share is the physical structure of the building while each apartment is a dedicated VPS server.

How does VPS hosting work?

With VPS hosting, the virtual server environment mimics a traditional physical server. Using virtualization technology, the physical server is divided into several virtual servers through a partition.

Each of these partitions acts as a virtual server that allows each user to install their own operating system, software, and more. Just like you would a traditional dedicated server. This type of partition is similar to when you partition your PC to run multiple operating systems such as Windows and Mac. Each operating system operates in a separate container and completely separate from the other operating system.

Even though it is a virtual VPS server, it works in the same way as a physical server. So, you don’t have to worry about other sites affecting your website.

Hosting your website on a VPS gives you access to a guaranteed level of server resources that you never have to share between other users.

VPS versus shared and dedicated hosting:

Before we cover the benefits of VPS hosting, let’s see how it compares to other forms of hosting:

Shared hosting:

With shared hosting, you share the cost of the server with hundreds of other users. This form of hosting is very easy to use and very suitable for beginners, but there are some drawbacks.

For example, there is a possibility that another site on the same server may be using more than its share of server resources, causing your site problems. Shared hosting can also support a specific site and volume of your site traffic.

Dedicated hosting:

With dedicated hosting, you have access to a full physical server. You can host a single website on this server, or use it for multiple properties that you manage. Dedicated hosting gives you an incredible level of power, performance, storage and security.

However, dedicated hosting is also the most expensive form of hosting, as you don’t split server costs. It also requires a higher technical level, as you will also be responsible for managing your own server.

7 advantages of virtual server or VPS hosting:

We have already mentioned some of the advantages of VPS hosting.

Here are the top benefits that VPS hosting offers:

1) Improved performance:

As your site grows and your traffic levels continue to climb, you need a host to support your website. You want fast download speeds, no matter how much traffic your site receives.

If your site’s traffic level is increasing, first of all, congratulations! Second, it’s time to choose a hosting plan that suits your website at the current and future stage.

A VPS plan is exactly what you are looking for. With VPS hosting, you’ll have more server resources at your disposal, so you can support growing traffic levels while maintaining a fast website.

2) Larger storage and bandwidth:

With VPS hosting you will have access to very high levels of storage space and bandwidth. This will help improve both performance (mentioned above) and reliability (mentioned below).

If you’re using a shared hosting plan, you’re going to be blown away by the available server space. Bandwidth can also support a large amount of traffic without any problems.

This added space and bandwidth can support sites with hundreds of blog posts, media-rich multimedia sites, and more.

3) Higher confidence level:

Shared hosting can be great when you’re just starting out. But, due to the large volume of websites that are locked on a shared server, you may end up with uptime issues.

Although today’s shared hosting has not eliminated many of the issues of the past. If you’re looking for uptime and high performance, it’s still not the best choice.

With a VPS, you are the only website using the server’s resources. Therefore, the only timely things you will want to do is to choose a hosting provider with low quality or more than the current resources of your application.

4) control and customization of a larger server:

Most VPS hosting plans offer a higher level of server control and customization. So, if you need a unique operating system or server setup that isn’t supported in a shared hosting plan, a VPS can be a good fit.

You also get root access to the server (similar to dedicated hosting), so you basically start with a blank slate and can customize your server to your website’s exact specifications.

This is a must for certain websites that require a unique software or server setup.

Some types of websites, such as e-commerce sites, may benefit from VPS hosting right from the start. Many e-commerce sites use software or require more stringent security protocols that may not be compatible with shared hosting plans.

VPS hosting ensures that you can fully customize your hosting settings to suit your website’s unique needs.

5) Ability to adjust the scale of your server:

VPS hosting is also highly scalable. So, if your site traffic is trending upwards, you can rely on VPS hosting to grow with you.

Compare this to other forms of hosting, such as shared hosting, where you have to upgrade to another type of hosting entirely once you reach your plan limit.

With VPS hosting, you only need to click a button to add more resources to your server. Plus, it’s easier to scale your server resources down and down. So, you can scale up when you upgrade, or during the busy holiday season, and scale down when traffic levels return to normal.

If you have variable traffic levels, from a site whose traffic continues to grow, VPS hosting may be best for you.

6) Cheaper compared to dedicated hosting:

Dedicated hosting is typically the most expensive hosting around the world, making it out of reach for many website owners. But, VPS hosting can provide you with the same feature without a significant financial investment.

You may not have as big of a server, but for most website owners, this will be more than enough.

With dedicated hosting, it doesn’t matter what percentage of server resources you are using now, you pay for the entire server. But, with VPS hosting, you have more control over server resources, so you’ll only pay for the resources you’re currently using.

This makes it more affordable than dedicated hosting, even beyond the initial monthly price.

7) Higher security level:

Since you are the only website using a physical server, you can experience a higher level of security. And this is just the beginning. You can also install custom security software, firewalls, and other security features to turn your website into a fortress.

VPS hosting is known for its higher level of security. Typically, this is hosted with dedicated hosting, which can provide you with some of the most secure hosting around.

Of course, a lot of how secure your website is is also about how secure your actual website is. Therefore, even with a super secure host, you should implement website security best practices.

Is VPS hosting right for me?

Most users who outgrow their shared hosting plans upgrade to VPS hosting. This form of hosting gives you more control over your hosting environment along with added storage and bandwidth. With this, you can easily support larger sites that receive a lot of traffic.

However, some site owners may require VPS hosting from the start. For example, if you want an e-commerce website or a site with higher security, you are starting up, so it makes sense to start with VPS hosting from the beginning.

But, most website owners turn to VPS hosting. Once you have access to shared hosting and notice a drop in performance, it’s time to upgrade. If you don’t have the budget and need for a dedicated server, VPS is probably your best option.

Here are the benefits your site will receive when you upgrade to VPS hosting:

  • Faster and more reliable server for high speed and fast download.
  • Access to a guaranteed amount of server resources.
  • Ability to scale your server resources as your site grows.
  • Isolation of other websites, so another website will never affect you negatively.
  • The level of security and customization is advanced and improved.

I hope you have a thorough understanding of VPS hosting and the benefits of using it for your website, so you are well informed to decide whether or not this style of hosting is right for you.

Guide to choosing the right virtual server

In this article, we intend to guide you, the dear ones and regular companions of hosting100, in buying and choosing a virtual server so that you can make the best choice and purchase according to your needs.

What is a virtual server?

A virtual server or VPS, which stands for Virtual Private Server, is a part of a complete dedicated server that becomes a virtual server with a virtualizer. The resources of the main dedicated server are divided between the virtual servers in which it is built, and the resources of each virtual server are separate and exclusive. Virtual server has less resources and cost than a dedicated server.

Things you should pay attention to when buying:

Choosing a good virtual server that fits the needs has always been one of the concerns of buyers and customers. For this reason, we are going to mention in this article some things that should not be ignored when choosing and buying a server, and if you follow these things when buying and choosing, you will have no doubt that you will have a good purchase that suits your needs. It is recommended to determine your purpose before buying a server. By doing this, you will roughly know your needs and make a good purchase according to your needs and goals.

In the following, we discuss the important things that should be checked when buying.

1- Virtual server location:

The first and one of the most important things you should consider is the location of the server. Currently, it is possible to get a virtual server from many countries of the world

2- Virtual server hard drive type:

hadr drive hosting100.net

Virtual server hard drive is one of the most important factors for choosing a suitable virtual server. Currently, 3 types of hard drives are used in virtual servers, each of which is suitable for the work that we will introduce below:

HOURS:

SATA hard drives, which is the oldest type of hard drive in this list, is one of the 3 types of hard drives used in virtual servers. The loading speed and reading and writing speed of this type of hard drive is very low compared to the next two types, and it is not recommended to use these hard drives to host websites. But this type of hard drive has two very good advantages, one is that they have a very affordable price, and two are that they have a large space and volume, that’s why it is recommended to use this type of hard drive in download hosts or as a storage space. Use large and heavy files.

SSD:

Compared to SATA hard drives, SSD hard drives have higher and better read and write speeds, or I/O, but they have lower I/O speeds compared to NVMe hard drives.

NVMe:

NVMe hard drives are the best type of hard drive used in virtual servers and have a very high I/O speed compared to the previous two types of hard drives. NVMe hard drives can be used in everything because they meet all your needs with their high speed, but they are expensive and finding a virtual server with NVMe space is a bit difficult and expensive.

If the cost is not important to you and you care a lot about processing speed, I suggest that you definitely use NVMe hard drives, otherwise, depending on your needs, you can use SSD or SATA hard drives.

3- RAM and CPU of the virtual server:

RAM and CPU are the two main pillars of a process, you should choose enough RAM and CPU for your server according to the amount of processing you create by running the project, if your server has RAM and CPU If you don’t have enough to process, the operating system will face a queue of processes, in which case the server will be overloaded and eventually your project will face slowness or complete shutdown.

4- virtual server management:

When you buy a virtual server, first an operating system is installed on it, and no configuration or changes have been applied to it, and the server is completely raw. In order to be able to make the best use of the server and start your project, a series of changes and configurations must be applied on the server, which in most cases the person who buys the server does not have this knowledge, that is why the host and provider must Choose the one that will help you manage the server. All configurations and installation of the program on the server are done for free in the hosting100 collection.

5- Monitoring:


By purchasing a virtual server, you will own a dedicated server with less resources and you can run your programs and projects on it. One of the important points is that your virtual server is always on and 24 hours a day without disruption or outage because any disruption can cause server failure or problems in running programs. Your host should use a monitoring service to fix any problems as soon as possible.

6- Support:

One of the most important things and factors not only in buying a server but also in buying any product, service or service is very important is support. Always keep in mind when buying your products that you will need support related to that product, so try to buy from a host that has good support.

The parameters that determine a suitable support are as follows:

  • Response time after sending a support request.
  • 24-hour response.
  • Specialized knowledge of the support unit.
  • Ways to contact support.

Fortunately, with the 24-hour support of hosting100, you can submit a ticket or call any time of the day or night to receive guidance or request support.

I hope this article was useful for you.

7 useful Linux commands for system administrators (SYSADMINS)

System administrator or SysAdmin is a person who maintains and manages a system or a computer network. In fact, the complete management of servers, clients, switches and a whole set of computer networks is the responsibility of the system administrator. As a system administrator, it is your job to ensure that your systems are running smoothly. This requires identifying and resolving problems, fixing security vulnerabilities, and ensuring that the IT infrastructure is always operational. If you’re new to the role, you probably already know that being a system administrator can be quite a challenge. You have many responsibilities to manage. But we are here to make it a little easier for you

1) Nmap:

The nmap command stands for “Network Mapper”. This directive is an open-source monitoring tool commonly used by system administrators to scan and discover networks. Thanks to its practicality, nmap has become one of the most popular tools among administrators. You can use it for:

  • Find live hosts on a network.
  • Scan ports and ping back and forth.
  • Identify operating systems running on your network.
  • Perform security audits.

You can even use nmap to scan for malware. Combined with an extensive library of scripts, Nmap is one of the most comprehensive tools in your arsenal. Before using it, you need to download and install nmap. If you are using CentOS or Fedora, use the following command:

sudo dnf install nmap

If you are using Ubuntu or Debian, use the following command:

sudo apt-get install nmap

2) Autoremove:

Having an unwanted and unused package on your system can be a security malware. One of these packages can become an entry point for a cyberattack, and your job as a system administrator is to reduce the threat vectors in your system. That’s why we suggest you remove the packages you don’t use. This reduces the possibility of being lost in a cyberattack due to software vulnerability or misconfiguration. Use the autoremove command to remove all unwanted packages from your system. You can do this by running the following command:

apt-get autoremove

This will remove the undeleted packages that remain on your server. After this is done, use the following command to see a list of all your packages:

apt-cache pkgnames

When you find one or more required packages, remove them with the following command:

sudo apt-get purge –auto-remove [packagename]

3) Sysv-rc-conf:

This command allows you to see the boot time of any service you are running and the services that are running in the background. You can use this tool to see if potentially harmful services are running. First you need to install the program. You can do this by entering the following command:

apt-get install sysv-rc-conf

After installing sysv-rc-conf, enter the following command in your terminal:

sysv-rc-conf –list | grep '3

The above command will show you what services are started when the computer boots and after that. If you suspect that a service is malware, disable it using the following command:

systemctl disable [servicename]

4) Iptables:

Iptables directive is a versatile firewall tool that you can use to protect your Linux system from malware. You can protect your system from malware using the following commands:

To control SYN packets:

iptables -A INPUT -p tcp ! –syn -m state –state NEW -j DROP

To drop null packets:

iptables -A INPUT -p tcp –tcp-flags ALL NONE -j DROP

To drop XMAS packages:

iptables -A INPUT -p tcp –tcp-flags ALL ALL -j DROP

To drop incoming packets with fragments:

iptables -A INPUT -f -j DROP

5) Netstat:

Basically, open ports do not cause problems. In fact, you need them to send and receive data over the Internet. However, having hidden ports can be a problem. Hackers can use these ports to access your system and you won’t even know how they are violating your cybersecurity measures. You can use netstat -antp to scan your system for hidden ports. This will give you a snapshot of all the open ports on your system. And when you come across a port you don’t recognize, close it using the following command:

sudo kill $ (sudo lsof -t -i: [portnumber])

The above command effectively reduces threat vectors.

6) Chkrootkit:

A rootkit is a set of malicious tools that allow attackers to gain remote access to your server. Think of it as a key that unwanted visitors can use to log into your system. Rootkits are designed to be difficult to detect. Because once you discover and remove the rootkit, you end up removing the backdoor that gave hackers access. Chkrotkit is a tool that scans your server for suspicious programs that could be rootkits. You can install this program with the following command:

apt-get install chkrootkit

Once you’re logged in as root, use the chkrootkit command. This program scans your server for malware and notifies you of any potential threats.

7) Update and Upgrade:

Keeping systems up to date is an important part of cybersecurity. Your operating system and applications should be patched regularly to address security vulnerabilities that could compromise your server. The update command is used to update the package list, while upgrading and installing downloads for you. Keep your system updated and secure using the following command:

sudo apt-get update && apt-get

Comparing ssd and nvme hard drives

As a tech-savvy person, you are probably aware of the technological advancements in the world of computer storage. Nowadays, many people are using NVMe hard drives and SSDs instead of using old hard drives, so this comparison of NVMe hard drives and SSDs will help you to know more about them. NVMe stands for Non-Volatile Memory Express, while SSD stands for Solid State Drive. While both are upgrades to traditional hard disk drives (HDDs), they function differently. SSDs still use the old SATA and SAS interfaces that were designed for hard drives. But NVMe drives use updated PCIe interfaces that lead to higher performance and write speeds

What is an SSD?

As technology advances, traditional hard disk drives (HDDs) have limitations in performance. Innovators got to work and unveiled new and advanced HDD storage solutions. It evolved into a solid-state drive (SSD), a storage device similar to its predecessor but much more powerful.

SSDs use flash memory to store data, and flash memory is the standard non-volatile NAND storage. However, since SSDs were designed to replace HDDs, they use the same SATA and SAS interface hardware to transfer data.

A powerful solid-state drive combined with an older interface limits its impressive capabilities. An important point to note is that SSDs do not have traditional moving parts like the spinning disks found in hard drives. Instead, an SSD accesses and stores data on semiconductor memory chips with no moving parts.

What is NVMe?

NVMe is the updated version of the solid state drive. The difference is that it bypasses the SATA path and connects directly to the CPU bus on the computer’s motherboard. Samsung introduced this storage technology in 2013 to help computers perform better than computers with SSDs.

Normally, NVMe stands for Non-Volatile Memory Express. An important factor to pay attention to is “e”, which stands for “express”. It refers to the Peripheral Express Connector (PCIe) bus. PCIe ensures higher data transfer and lower latency rates.

Since it’s a non-volatile storage type, you won’t lose data in the event of a power outage. It is also important to note that these advanced SSDs have an average read and write speed of 4000 MB. This is 20 times faster than a standard SSD.

What is the difference between NVMe and SSD?

Understanding the NVMe vs. SSD comparison may be confusing to some, but it’s actually fairly simple. Essentially, any NVMe storage device is an SSD device. But not all SSD hard drives are NVMe hard drives. In other words, an NVMe drive is a type of SSD drive, but there are other types of SSD drives available.

Here are some notable differences when comparing NVMe vs. SSD storage types.

Cost:

The price difference between NVMe hard drives and SSD is not much, but the higher cost you pay for NVMe hard drives will make you use more speed, although SSD hard drives may also meet your needs in terms of speed. Definitely, the choice of NVMe hard drives is very different from SSD hard drives, and their cost is reasonably higher than SSD hard drives, so they are a better choice.

input/output speed :

This is probably the most notable feature of the NVMe vs. SSD comparison. Essentially you can have NVMe drives much faster than any form of regular SSD. Therefore, NVMe solutions are a more robust and innovative option.

NVMe SSDs record average read and write speeds of 4,000 MB/s. And that speed is even higher for advanced enterprise NVMe drives. The reason is that their read and write speeds are on average 4 to 7 GB/s.

On the other hand, regular SSD drives record speeds of up to 400 MB/s. That’s roughly ten times slower than your standard NVMe drive.

Appearance difference:

When considering the types of SSDs available, many tend to think that NVMe SSDs are only made for M.2 ports. Likewise, some have the impression that SATA SSDs are only a 2.5-inch storage solution. Well, it’s not, because these types of memories share common form factors.

The truth is, you can have 2.5-inch NVMe drives as well as SATA M.2 SSDs. However, the physical difference to note is usually in the keys.

SATA M.2 SSDs have a combination of B+M keys. On the other hand, NVMe M.2 SSDs only form the M key.

This difference means that you can plug a SATA M.2 SSD into any M.2 socket, but you cannot use an NVMe drive into any socket. You must have a compatible socket for the NVMe M.2 SSD connection to work.

On 2.5-inch SATA SSDs, the connectors are also different in that the NVMe U.2 SSD connectors are not configured in the same way. This is due to the key B+M vs. M difference between the two.

Conclusion:

Comparing NVMe hosting and storage to SSDs can be challenging, especially if you’re new to the world of web hosting. However, with the right knowledge, you will soon have the information you need to make an informed decision.

This comprehensive guide provides all the information you need to effectively compare SSD and NVMe hosts. and analyzes the benefits associated with NVMe hosting and how to evaluate hosting providers for your website. We hope this article was suitable for you.

Why should we not use Elementor in WordPress?

Why should we not use Elementor in WordPress?

Problems and disadvantages

Websites have the ability to create various pages and content using content management systems such as WordPress. One of the popular WordPress plugins is Elementor, which allows users to design web pages without the need for professional coding. However, although Elementor seems to be a powerful tool, it also comes with some drawbacks and problems. In this article, we will take a closer look at the problems and disadvantages of using Elementor in WordPress.

Complexity and high volume of codes

Using Elementor in WordPress can lead to the creation of complex and high-volume codes. This increases the loading time of web pages and thus reduces the user experience. Search engine algorithms like Google also pay attention to page loading speed, and long loading times can lead to lower rankings in search results.

Reduced accessibility

Using Elementor can lead to reduced website accessibility. Because this tool requires JavaScript, and if JavaScript is not enabled in the user’s browser, web pages will not be displayed correctly. This prevents content from being accessible to users who may be experiencing technical issues with their browser or have disabled access to JavaScript for security reasons. As a result, using Elementor may exclude a portion of the user population that would like to access your website.

Design and customization limitations

Although Elementor offers users a wide range of design and formatting tools, in some cases it may impose limitations on the design and customization of pages. For example, you may not be able to implement some special effects or complex formatting to your liking. These limitations can reduce your creativity and power in website design, and the final result may not match your expectations.

Inadequate support and updates

One of the challenges you may face using Elementor is its inadequate support and updates. As WordPress and its plugins are updated, so too is Elementor. But the problem is that some other WordPress themes and plugins may not be compatible with the Elementor update. This can lead to disturbances in the performance of your site and in some cases even cause the inability to use the site correctly. In addition, if Elementor’s developers decide to drop support and update it, you may experience security issues and performance defects that will not be fixed without an update.

Restrictions on data transmission

The use of Elementor may result in data transfer limitations. Typically, WordPress is stored as a text database that is easy to back up and transfer. But using Elementor and applying visual changes to the pages makes it more difficult to transfer data and the site to another content management system. If you decide to transfer the site to another content management system in the future, you must transfer the content designed using Elementor to the new content management system manually or by using appropriate conversion plugins. This can be time-consuming and require re-manipulation of pages and may result in loss of original page formatting and styles.

Speed ​​and optimization problems

Using Elementor may slow down page loading and make optimization more difficult. By default, Elementor loads large CSS and JavaScript files, which can increase page load times. Additionally, some Elementor elements and widgets use complex JavaScript code that requires other files to be loaded and executed, which can also negatively impact page loading speed. Slow page loading speed can lead to an unpleasant user experience and increase the rate of users leaving your website. Also, slow page loading speed plays an important role in improving a site’s ranking in Google search results, as Google considers algorithms for page loading speed.

Very high consumption of resources

The high consumption of Elementor resources without visitors and when the admin works on the site himself is one of the significant disadvantages that should be considered. When Elementor is in use, server resources are actively being used, even if there are no visitors on the site. This high consumption of resources can increase costs and decrease page loading speed. In addition, when the admin works on the site himself and Elementor is active, it may interfere and cause problems such as some incorrect functions or errors in editing pages. As a result, keep in mind that using Elementor in this situation may cause problems and it is better to explore alternative solutions such as using lighter plugins.

Elementor plugin dependency

Using Elementor may make you very dependent on this plugin. If in the future you decide not to use the Elementor plugin or move to another plugin, your pages may become broken and inconsistent. In this case, you have to consider the time and cost to revise and re-edit the pages and start designing new pages if needed. This dependency can limit your choice of other plugins and your privacy, as you need to make sure that all plugins and changes you make in the future are compatible and compatible with Elementor.

Translation and multilingualism problems

If your site needs to be multilingual and you use Elementor to design pages, you may face translation and multilingual problems. Some translator plugins may not be compatible with Elementor or may not correctly display translations of pages designed with Elementor. Also, if you’ve designed parts of the pages with Elementor and plan to translate them into another language, you’ll need to manually access the pages and make the necessary changes.

Need to teach and learn

Using Elementor to design web pages requires training and learning. In order to optimally use Elementor’s features and capabilities, you must familiarize yourself with its user interface and functionality. This may require more time and effort and may be difficult for those who are new to the world of web design. So, if you don’t have the ability and time to learn Elementor, it might be better to use simpler and less complicated ways to design pages.

Inefficiency in certain cases

If you have specific needs for designing your pages, Elementor may not be able to fully meet those needs. Some of the more complex features are missing from Elementor and you may need plugins and other customizations. This may take more time and money to design your pages, and you may need to hire more professional developers to do specific tasks.

Deciding to accept problems

Ultimately, the final decision is yours. Despite all the problems and weaknesses that Elementor has, keep in mind that using it in WordPress requires a careful assessment of your needs and limitations. Before making a decision, it is best to carefully compare the pros and cons and pay attention to your specific needs.

If you want to try another solution, there are some alternatives to Elementor in WordPress. For example, you can use plugins like Beaver Builder, Divi Builder or Visual Composer. These plugins provide you with more features and templates and provide wider possibilities for designing web pages.

Also, if you have access to a professional WordPress developer, you can customize pages using direct coding in the classic WordPress editor. This method allows you to create pages exactly to your liking, but requires programming skills and familiarity with languages ​​such as HTML, CSS, and PHP.

Ultimately, choosing the right way to design web pages and using different tools depends on your needs, skills and experience. The most important thing is to choose the right tool according to your needs and the level of skill and knowledge you have.

Suggestions for replacing Elementor

If you have decided to skip Elementor, you can turn to other options for designing web pages in WordPress. Here are some alternative suggestions:

1. Beaver Builder: This is a powerful and simple page design plugin that allows you to create your own pages with an intuitive and simple user interface. This plugin has more extensive features and allows you to create beautiful and professional templates for your website.

2. Divi Builder: This is a popular and efficient page design plugin that has many features and facilities. With Divi Builder, you can create beautifully designed, responsive, and custom pages.

3. Visual Composer: This is a powerful plugin for designing web pages that provides you with various features and capabilities. With its intuitive and simple user interface, you can easily create amazing web pages.

4. Customization with direct coding: If you have programming experience or have access to a professional WordPress developer, you can use direct coding in the classic WordPress editor. This method allows you to fully customize your pages.

support hosting100