Archive

How to transfer data securely with Filezilla


Since the information of a site is known as its most important asset, how to transfer it safely with Filezilla is one of the methods that webmasters or site managers should be trained in order to transfer its information safely.

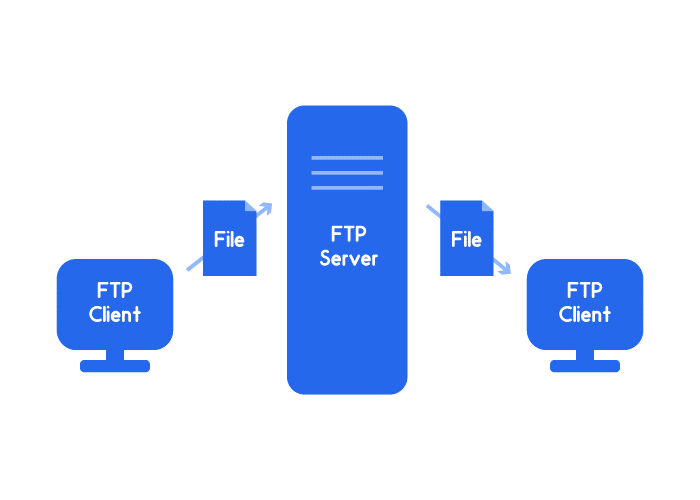
Filezilla or in other words Filezilla is a very powerful software that is used to upload and download files on servers. Filezilla is a type of graphical interface that is welcomed by many users, because the operation of transferring information through it is done safely. Therefore, if you are looking for information on how to securely transfer information with Filezilla, stay with us in the rest of this review.

Terms of secure data transfer with Filezilla

In order to be able to explain how to securely transfer data with Filezilla, we first need to provide explanations regarding the conditions of this operation.

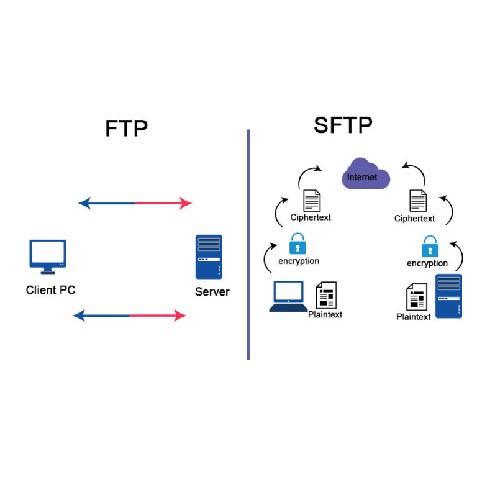
Two valid protocols SSH and TLS are available for secure communication between two computer systems. In the context of client-server communication, these two protocols have been created in the way of encoding the exchanged information. The configuration of these protocols is correct so that information can be transferred safely, because in the past there was a possibility of unauthorized access to information due to lack of coding, and now this problem has been solved with coding.

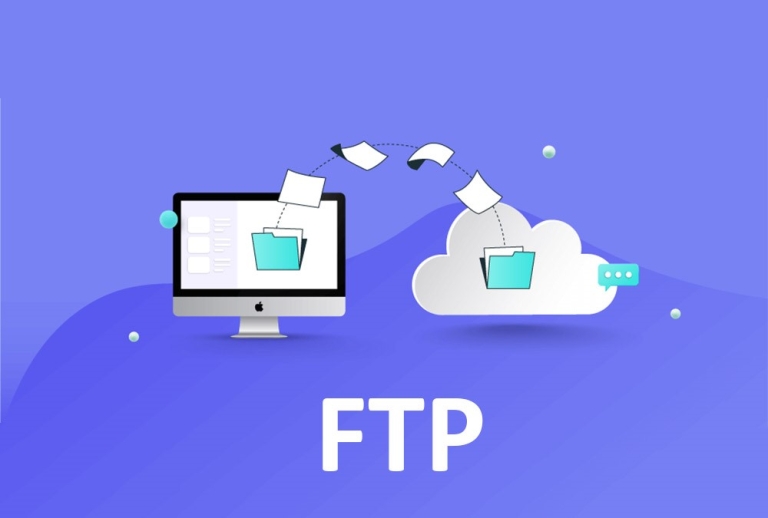
By means of exchange keys, it is possible to send and receive transmission information in the platform of the mentioned protocols; Because these protocols use different algorithms and structures to encode information. Also, it should not be said that the exchange keys are provided to the source and destination subsidies in order to send and receive transfer information. In general, in order to upload and download data exchanged between two computers, there are four options, which include File Transfer Protocol (FTP), Secure Copy Program (SCP), Secure Protocol File transfer (SSH File Transfer Protocol “SFTP”) and file transfer protocol on FTPS or TLS / SSL.

Continuing to examine the conditions of how to securely transfer information with Filezilla, it is good to compare FTP, or the same file transfer protocol, with other information transfer protocols.

In fact, FTP is identified as the most unsafe protocol among the four options that were introduced to upload and download information between two systems. Therefore, it should not be used to communicate with the server and transfer files. Our suggestion is SFTP and SCP, which provide you with more security.

Another point that is examined in this comparison is related to the fact that SFTP and SCP do not require the installation of external software for use in the SSH platform, this is in the case that FTP requires the installation of external software such as ProFtp. Of course, it is noteworthy that even though SFTP and SCP have similar features in terms of efficiency and security, SFTP is generally preferred. Because under the conditions of file transfer disconnection, the transfer operation will not continue and the work process must be resumed.

In the meantime, we should mention that SFTP and FTPS protocols are different from each other and are known as two completely separate methods. These two protocols use different processes to transfer information. It is true that in terms of security, these two protocols are similar, but they should not be considered the same because of their nominal similarity. Considering that FTPS cannot be used on sites that do not have an SSL certificate and requires additional settings, it can be concluded that SFTP is known as the best protocol for transferring files between two systems.


As we mentioned at the beginning of this review, information is considered as the main and most important asset of the sites, so many protocols and software have been designed to secure the transmission of information. These tools were created to transfer files from a PC (personal computer) or host to a virtual or dedicated server.

As you are aware, the issue we want to investigate is related to how to transfer information securely with Filezilla, so we can introduce Zilla file for secure transfer of information. Filezilla software is able to design a user-friendly and beautiful graphical interface so that the desired files can be transferred to or received from the server. Also, Filezilla removes things like commands that are in the command line and provides you with a safe platform. Therefore, despite the information we have obtained from valid protocols, it is good to examine how to transfer data securely with Filezilla.

Secure data transfer with Filezilla

As we concluded earlier, the SFTP protocol is known as the best option for data transfer, which is suitable for file transfer in Windows and Linux operating systems. To support SFTP, there are many software such as Filezilla, Cyberduck and WinSCP, and due to the fact that Filezilla is free, the transfer training from this software can be studied. We must mention that this software is compatible with Windows, Linux and macOS operating systems.

Authentication

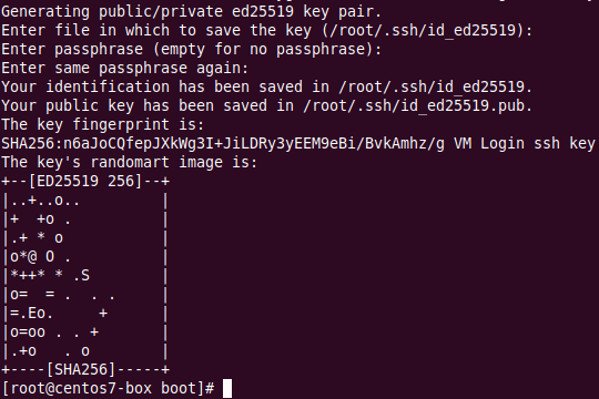
The first step to use the Zilla file software is two authentication options, which are necessary to use SFTP and connect to the server. The first authentication involves the use of a password, and the second is related to the SSH Key, which includes more benefits. To save the SSH public key, you can refer to the settings page to make a secure connection to the server. Of course, note that the method of creating public keys is different in Windows and Linux operating systems. To create two SSH keys and connect to the server in Windows, the tutorial on how to create SSH Key with Putty will help you.

Connect to the server with an SSH key

First, by having an SSH Key, you can easily connect to the server and transfer the file. Open the Filezilla software, enter the Edit menu and touch the Setting option. Next, to search for the SFTP option, refer to the menu on the left side of the page and the connection sub-sets. Then select the Add keyfile button and specify the private key path.

In the next step, you should select Site Manager from the File menu, and then touch the New Site button and choose a name for it.

In the next step, there is a series of fields or blanks that you must complete; Proceed as follows:

  • Enter the address of the ftp server in the Host box.
  • Enter the port number of the SFTP connection in the Port field.
  • You can use a desired port number in the default mode.
  • Put the protocol drawer on Transfer Protocol SFTP – SSH File option.
  • Select Interactive mode for the Logon Type drop-down box.

If you want to use a key file protected with a password, the Pageant tool can be considered a suitable option in the Zilla file. Therefore, after running Pageant, right click on the icon. Then touch the add key option and remove your Private Key file. You can follow the steps required to enter the password.

As the last step, you must click on the Connect option so that the Zilla file starts the setup operation. In this regard, by means of SFTP and Public Key SSH2, you can connect to the server with a username and without a password. Don’t forget to close Pageant after the operation.


Edit text file using Filezilla

Editing of programming text files is necessary due to the management of the virtual server itself. This is despite the fact that the Zilla file software does not provide this possibility. But the good news is that you can specify which editor or text editor to open the desired files automatically or by default and allow them to be edited. For this, you need to go to the settings and select the Edit section at the top of the screen and click the File editing option from the left side menu.

After you have selected the option to edit the file, you must activate the Use custom Editor option and click the Browse button to specify the path of the exe file that is related to the text editor.

One of the things we can share with you is that Notepad++ editor is very popular among Windows users. This editor is lightweight and supports many programming languages. However, if you want to use another editor, proceed through the Browse option and then click OK to apply the settings you have implemented.

Finally, we feel it is our duty to point out once again that the platform you choose or the type of platform is very important in terms of safe data transfer and server connection. Any move that seems simple to you can put your entire data at risk. Therefore, do not hesitate to choose information transfer software and server connection and take data security seriously. In this regard, our proposed software, Filezilla, is a good option for connecting to the server and transferring information.

The importance of maintaining information security

You may think to yourself that information is always at risk and this is an undeniable principle. Yes, this mentality is completely correct, but the most dangerous moment when it can be said that information is in danger is when it is transferred. Just like prisoners who are taken to court. In the meantime, the possibility of infiltration and escape of prisoners is very high, and a proper security system must be installed. Therefore, the same story is going on regarding the information of the site, and one should make every effort to maintain the security of the data.

We hope that all the information we mentioned about the Zilla file can be useful in order to keep your site’s information safe during the transfer and connection to the server.


What is Lightspeed?


What is Litespeed and what are its features? You have probably heard the name of Lightspeed web server by now. Before you know what Lightspeed is and what it is used for, it is better to familiarize yourself with the web server. A web server is actually a software that responds to user requests on the World Wide Web. Web servers are responsible for storing web pages, processing their information, and responding to user requests when a user requests to view a page. There are several application web servers that you can use. Some of the best of these software are:

  • LiteSpeed ​​web server
  • Apache web server
  • Microsoft IIS web server
  • Nginx web server

Litespeed can be considered one of the best and fastest web server software that many people use these days to manage their servers. As one of the great advantages of this software, which has been welcomed by a large number of Internet users, we can mention its security and high speed. Some users ask us how Lightspeed is different from Apache web server. Although in practice the use of both is similar, but it is not bad to know that Litespeed has a speed about 6 times faster than Apache web server.

This software is provided by LiteSpeed ​​Technologies. OpenLiteSpeed ​​is the name of the servers of this web server, which has advanced technology. These servers are able to respond to users’ requests in a fraction of a second. Because of this, Litespeed web server could soon become an unrivaled alternative to other software such as Apache web server. If you want to know more about the applications of this software, stay with us until the end of this article.

Advantages of Lightspeed over other web servers

What are the advantages of Litespeed? Why is this software so popular? Today, most hosting companies prefer to use this web server, if before its introduction, Apache web server was the most popular. Undoubtedly, this software has been able to display merits that other similar software did not have these features. In the following, we have mentioned the most important advantages of Lightspeed compared to other web server software.

High speed light speed

As you know, in the discussion of server management, high speed is the first and last word. Other similar softwares have often been abandoned by hosting companies due to slow response times to user requests. If this web server is used, the user will receive the answer to his request quickly after entering the web. If you want to have a real competitive advantage over your competitors, our recommendation is to buy Litespeed.

Server stability

Another very important factor that you should consider while buying a web server is the stability of the server to keep the uptime of the site high. Uptime is the amount of time a server is available to users and responds to their requests. If the uptime of the site decreases for any reason, it can have a lot of negative effects on the user experience. But what is the advantage of light speed? By purchasing this web server, you can reach 99% uptime.

Sites that have a lot of traffic or experience heavy traffic in specific periods of time are always concerned that their site server is not able to respond to this volume of user requests. To solve this concern, it is enough to experience a period of using Light Speed. By purchasing this software, regardless of how much traffic your site has over time, the server and site will always be available for users.

Works on old browsers

Another advantage of this software is its high flexibility. This software is able to provide hosting programs based on Linux and Windows. Also, if your website works with old versions of the browser, there is still a special feature for this software that the user will not face any problem to receive his request from your site. Litespeed management system can be considered one of the most useful web server management systems.

High security of the Litespeed web server

Another prominent feature of this software is its high security. Do you have an online business but you are not sure about the security of your site? Changing site files through hackers and their vandalism is one of the threats you may face while managing a site. Therefore, the design company of this software has considered a feature for it, despite which the files of your website will not be changed without your knowledge. This high-speed web server works without being affected by the activity of viruses that may penetrate your site in any way.

The price is right

Another advantage of this web server is its affordable price. If you have just launched a website and want to have a high-speed web server with great features for a low cost, you can purchase a LiteSpeed ​​license. This software has different licenses.

Simple user interface

As the last advantage of this web server that we intend to review in this article, we can mention the easy installation, user-friendly design and simple user interface of this software. Even if you don’t have much technical expertise, with just a little mastery in working with this platform, you can easily take advantage of its features and edit your site’s server settings.

In addition, the designers of this software have designed it in such a way that you can easily access the web server directory. This accessibility gives you the opportunity to always implement the necessary updates and changes on your site. By purchasing Litespeed, you will not have to worry about updating PHP because it is done automatically. Litespeed web server has made server management as simple as possible.

LiteSpeed ​​web server versions

There are three versions of Litespeed, depending on the type of site and the amount of traffic, you should choose the best version for your site. In the following, we have introduced these three items so that you can decide to buy the best one with a better understanding of the various versions of this software.

Professional version

Big and famous hosting companies use this version of the web server software. If you have a large website with high traffic, our recommendation is to use the professional version of Lightspeed. The support of this version of the software can be done both through the DirectAdmin control panel and through CPanel.

Standard version

It is one of the other versions of Lightspeed software. The advantage of this version is that it is compatible with cPanel, DirectAdmin and WHM control panels. Another feature of this version is that it is free. But the thing that you should pay attention to is that this version is mainly used for sites that do not have high traffic. Commercial sites and small stores with not very high traffic can use this version of the software.

OpenLiteSpeed ​​Edition

As the name suggests, this version of Litespeed is open source and free. It is functionally similar to the professional version. That is, you can use it for large and high-traffic sites. But the difference with the professional version of Lightspeed web server software is its lack of compatibility with hosting control panels such as cPanel and DirectAdmin. The Open Lite Speed ​​Edition version of this software seems to be a suitable option for personal and commercial sites.

How to choose the best lightspeed license?

As you read a while ago, this software has different licenses. The company of this web server has provided its users with a series of free licenses with 15 days validity. In these 15 days, you can use Lightspeed license for free so that you can more easily decide to choose the best version. But how to choose the best license? The best web server software for each website is different according to the features of that site.

On the other hand, with the variety of licenses of this software, there is no other way but trial and error to find the best version. Therefore, our recommendation is to use free licenses first, so that during the validity period of the selected license, you can reach the best version of this web server for your site by evaluating the performance of the site and the server.

The difference between Litespeed and Apache

Lightspeed performs better than Apache in terms of speed, security and user interface. As another advantage of LiteSpeed ​​over Apache, LiteSpeed ​​consumes less memory than Apache when serving the same content. DDOS attacks are referred to as situations in which, in a period of time and at once, the site’s traffic increases so much that the server is unable to respond and the site is unavailable.

DDOS attacks are usually carried out by competitors. Litespeed’s performance is better than Apache because it can better prevent the site from these attacks; Without needing to install additional hardware on your site. If you have had the unpleasant experience that your site is unavailable for various reasons, it is better to replace the Litespeed web server with the web server you are currently using.

How to switch from Apache to Lightspeed?

Many people who use Apache software may think that by upgrading Apache they can improve its performance. Although the hardware upgrade of this software is not ineffective and improves its performance to a great extent, the thing you should pay attention to is that the cost of buying a Lightspeed license is more affordable than upgrading the Apache web server hardware many times! How can we switch from Apache to Lightspeed?
This transfer is easily possible. Another feature of LITESPEED is its compatibility with Apache. In other words, Lightspeed can act as a direct replacement for Apache by configuring files.

Litespeed installation tutorial

Easy installation of Litespeed is one of the advantages of this software. Simply install this software in a few steps:

  1. In the WHM plugins section, click on the LiteSpeed ​​Web Server plugin.
  2. Select the Install option.
  3. After clicking on the Install option, enter the license serial number.
  4. Then click Next to continue the installation process.

You can install this software easily and only by following the above 4 steps.


Step-by-step guide: Creating a website using a Linux VPS

VPS hosting allows you to get dedicated resources to host your website on a shared server. So basically a VPS host is offered as a partial and dedicated one. VPS is one of several ways you can host your website on the Internet. It is usually preferred over shared and dedicated hosting servers because:

A) Shared hosting multiplies in flexibility, availability and performance.

b) It is much cheaper compared to fully dedicated hosting.


In a VPS hosting, there are different website files but each set of files are in a separate virtual space, which allows website owners to enjoy the benefits of dedicated resources at a fraction of the price. In this article, we will share a step-by-step guide to creating a website using VPS hosting. We will first describe the main components and programs used, including Apache, MySQL, Perl/CGI, and PHP.

After that, we will show you how to upload your website content using FTP. This tutorial is designed to meet the needs of beginners and experts alike, so it doesn’t matter if you’ve never hosted a website before, this tutorial will cover everything you need to host your first VPS use:

The first thing you should do is get a VPS hosting from a reliable VPS hosting platform. After purchase, you should be given login information which will be required to continue setup.

Connect to the remote server (Remote server)

To connect to a remote VPS server, you will use the ssh command as follows:
ssh root@XXXX where root is the username provided to you and XXXX is the local IP where the server is hosted. When prompted, enter your password to continue.

Update the system

As a recommended preliminary step, you should update your system packages. This is especially important since we’re going to install PHP and Apache, which often have a large number of dependencies that a system-wide update will automatically receive. Depending on the Linux distribution your server is running, use the apt-get or yum commands to update your system (as follows):

1
2
Sudo apt-get update
Sudo yum update

Installing the necessary tools:

Now we need to install our web server, Apache, database application, MySQL and code interpreters, Perl and PHP. From

1
yum install httpd php php-mysql perl mysql mysql-server

or use:

1
Apt-get install httpd php php-mysql perl mysql mysql-server
Apache configuration

Now we are going to the technical part of this tutorial. If you plan to host a single website, all you have to do is copy your files to the default var /www/ directory and watch the magic happen. However, you can host multiple websites on a VPS server to take advantage of its true potential. For security, it is recommended to create a user for each website and then keep the files for that website in the public_html folder in main /home. This creates a clean, easily maintainable directory structure and also adds security to the mix. Let’s start the process:

1. Add new user: useradd john

2. Set a password for the newly created user: passwd john

3. Create a new folder in the home/ folder: mkdir / home / john / public_html

4- Give ownership of the newly created folder to the newly created user: chown john: john / home / john / public_html /

5. Set the permissions for the folder: chmod 755 / home / john / public_html / && chown 711 / home / example /

6. Edit the /etc/httpd/conf/httpd.conf file using your favorite editor. For this example, we will use vi: vi /etc/httpd/conf/httpd.conf

Scroll down to the bottom of the file and enter the following code to add a virtual host:

1
2
3
4
5
6
7
8
9
10
11
12
13
14
15
NameVirtualHost *:80
RewriteEngine on
RewriteCond %{HTTP_HOST} ^www\.ariaservice\.net$ [NC]
RewriteRule ^(.*)$ http://ariaservice.net$1 [R=301,L]
ServerName www.ariaservice.net
ServerAlias www.ariaservice.net
DocumentRoot /home/john/public_html
ErrorLog /var/log/ ariaservice.net_error_log
CustomLog /var/log/ ariaservice.net_access_log combined
DirectoryIndex index.html index.htm index.php index.php4 index.php5
SetOutputFilter DEFLATE
Options -Indexes +IncludesNOEXEC +SymLinksifOwnerMatch +ExecCGI
allow from all
AllowOverride All

In the lines of code above, modify the /home/john/public_html path according to your username, wherever you see it. Also change www.ariaservice.net to your website domain name wherever required. Save the file and close it.

7. Now, we need to make sure that Apache starts as soon as the device is turned on.

1
2
3
etc/init.d/httpd start/
chkconfig httpd on

8- As the last step, we need to connect the DNS A record to the IP address of our server. It maps your domain to the device’s IP address and ensures that whenever your domain name is entered, a request is sent to your server. Once you’ve done this, you can visit your domain to see if you’ve been redirected to the default Apache page. If everything is fine, continue.

MySQL configuration

1. As a first step, start the MySQL server and set it to start on startup.

1
2
3
/etc/init.d/mysqld start
chkconfig mysqld on

2. Set the root user password for MySQL. To do this, use the following commands:

1
2
3
mysql -u root
UPDATE mysql.user SET Password = PASSWORD(‘P@ssw0rd’) WHERE User = ‘root;'

Replace the string “P @ ssw0rd” with the password you want to set.

3- In the next step, create a database and grant the necessary privileges to the relevant user.

1
mysql -u root -p

Creating a database test:

1
2
3
grant all privileges on test.* to john@localhost;
FLUSH PRIVILEGES;

Obviously, you’ll replace test and john@localhost with whatever name you want for your database and username, respectively.

Upload your files using SFTP

Now that MySQL and Apache are up and running, you simply need to upload your website files. You can use any SFTP (SSH File Transfer Protocol) client, but we recommend using FileZilla. Follow these steps:

1. Connect to your server using the username you created.

2. Select all your website files and upload them to the home / public_html/ directory.
This is it. Now when you enter your domain name in the browser, you should be redirected to the home page of your website.


And finally, VPS hosting is an affordable way to enjoy the benefits of dedicated server web hosting without paying full price. In this tutorial, we have taught you all the necessary steps to host your first website on a VPS hosting server. Once your website is live, you can modify it to your liking.

Installing Laravel and Composer on the cPanel server

Laravel is a free and open source PHP framework for developing web applications. Some of the features of Laravel are a modular packaging system with a dedicated dependency manager, different methods for accessing relational databases. Laravel, along with Symfony2, Nette, CodeIgniter, Yii2, etc., is known as one of the most popular PHP frameworks. Laravel tries to make things easier by reducing common tasks used in most web projects, such as authentication, routing, sessions, queuing and caching. Laravel provides the powerful tools needed for large and robust applications. It supports multiple platforms and allows users to develop MVC web applications.

Server requirements

The Laravel framework has several system items. You need to make sure that your server meets the following conditions:

1
2
3
4
5
6
7
8
9
PHP >= 5.6.4
OpenSSL PHP Extension
PDO PHP Extension
Mbstring PHP Extension
Tokenizer PHP Extension
XML PHP Extension
Automatic installation of Laravel via Softaculous installation script

Laravel can be installed automatically on cPanel server using Softaculous script installer software. Log in to cPanel and find the Softaculous menu under Software and Services. Once done, you will be redirected to the Softaculous home page. Type Laravel in the search bar and click on the result. Go to the Install tab, where you will be asked to select the folder where Laravel will be installed. Feel free to choose the directory you need (note that this directory will be created by Softaculous). This is the easiest way to install Laravel.

Manual installation of Laravel

Laravel uses Composer to manage its dependencies. Before using Laravel, make sure you have Composer installed on your machine. It is a tool for dependency management in PHP. It allows you to install the libraries your project depends on and manages them for you. Run the following commands to install Composer and SSH on the server.

1
2
cd / bin
wget https://getcomposer.org/installer

Before installing, let’s check your compatibility using the command below.

1
2
php installer –check
All settings correct for using Composer

If everything looks good, let’s install Composer.

1
2
3
4
php installer
Downloading…
Composer successfully installed to: /bin/composer.phar
Use it: php composer.phar

Now that Composer is installed, we can uninstall the installer.

1
rm -f installer

Now we can use this Composer to install Laravel. Run the following command to install Laravel.

1
php /bin/composer.phar create-project laravel/laravel –prefer-dist

After installing Laravel,

Connect Laravel’s public directory to the public_html folder as a symbolic link like the code below:

1
2
3
rm -rf public_html
ln -s laravel/public/ public_html

After all the installation steps, open the browser and go to the relevant domain. Installation is complete and some configuration settings are required.

Laravel configuration settings

Public Directory

After installing Laravel, you need to configure the document/web root of your web server as a public directory. index.php in this directory is the front controller for all incoming HTTP requests to your application.

Configuration files

All Laravel framework configuration files are stored in the config directory. Each option is documented, so feel free to browse through the files and familiarize yourself with the options available to you.
Directory permissions

After installing Laravel, you may need to configure some permissions. The directories in the cache directory and bootstrap/cache folders must be writable by your web server, otherwise Laravel will not run. If you are using a Homestead virtual machine, these permissions must already be set.

Urgent/ The death of Iran’s President Raisi and his companions after the helicopter accident

News about the incident of the helicopter of the President of Iran Ebrahim Raisi and his companions have been published around Varzeghan. The president and his entourage usually use a Mil 17 or Bell 214 helicopter, which appears to have been a Bell 214 helicopter this time. Ebrahim Raisi, Al-Hashem Imam of Tabriz, Amir Abdullahian, Minister of Foreign Affairs, Malik Rahmati, Governor of East Azerbaijan, and several other people were among the passengers of this helicopter.
However, some of the president’s companions in this helicopter have managed to contact the center, and thus the hope for the end of this incident without loss of life has increased.

In this convoy, there were 3 helicopters, two of which were carrying some ministers and officials, reached their destination safely.

Preliminary news shows that the convoy carrying the President and his companions on the trip to Tabriz includes three helicopters. The first two helicopters were carrying some ministers and officials, all of whom reached their destination safely. But the third helicopter, which was carrying Ebrahim Raisi along with Ayatollah Al-Hashem, Imam Juma of Tabriz and Hossein Amirabdollahian, Minister of Foreign Affairs, had an accident.

Tabriz provincial network announced in subtitles that the incident happened in Jolfa area. Sahand Network wrote in a subtitle with the tag of urgent news: It announced that severe weather conditions and the presence of thick fog made the access of rescue teams to the scene of the accident slow.

Ebrahim Raisi’s Instagram page now asks people to pray for his health and his companions

According to the reporter of Khabar network, due to the fog, the field of view has reached below 5 meters and this has made it difficult for the rescue team to search.

According to the head of the Red Crescent, 49 groups from the rapid response team are involved in the rescue operation, and due to the impassability of the area, it is not possible to search by car or air, and the rescuers must reach the accident site by ground.

The exact position of the helicopter was found by the heat-seeking drone, but there are no signs of the passengers being alive

According to news agencies, the names of the martyrs of the crash of the helicopter carrying Raisi and the accompanying delegation are as follows:

1- Seyed Ebrahim Raisi
2- Ayatollah Seyyed Muhammad Ali Al-Hashem
3- Hossein Amirabdollahian
4-Malek Rahmati
5- Sardar Seyed Mehdi Mousavi
6- An Ansar al-Mahdi Corps (identity unknown)
7- Pilot (unknown identity)
8- The pilot’s help, unknown identity)
9-Kruchev (unknown identity)

How long should we upgrade the site?

Hosting upgrades are among the important measures that webmasters should pay attention to. You may ask why? Because the host is an essential space for maintaining and maintaining the data of a website. Perhaps it is better to say that every website needs this space to be active on the web. Also, maintaining data security, increasing loading speed and site availability depends on the quality of the host.

Since the world of technology and information technology is considered a broad and dynamic platform. As a result, the main condition for permanence in this space is to move forward. For this reason, neglecting the host and not upgrading it on time will lead to a decrease in the site’s rank on the web platform. With these interpretations, if you want your website to continue its activity, don’t forget about hosting upgrades. In this regard, we will provide you with useful information about this important issue.

Starting websites with shared hosting

Perhaps it is better to give a brief explanation about shared hosting at the beginning. Shared hosting is a type of website hosting space, the resources of which are shared by several different users. In fact, sharing is like a public vehicle, or rather, it is like a bus, where each person has a specific seat and space, but their vehicle and route are shared. Usually, since websites do not need many resources at the beginning of their work, and webmasters have a limited budget. Shared hosting is a good choice for hosting new websites.

Of course, it should also be remembered that in order to start working on shared hosting websites and generally to provide a host, you must refer to reputable companies. Because some hosting companies offer server resources to many sites to earn more money. Undoubtedly, this issue slows down the speed of the site and endangers its security.

In general, shared hosting is suitable for starting websites, but as the number of site visitors increases, it requires more space and resources. So it is necessary to upgrade the host as soon as possible.

Signs that you should change your hosting service

In this part of this article, we are going to tell you that if your website is in the following conditions, you should upgrade your hosting as soon as possible.

There is a disturbance in the speed and performance of the site

Undoubtedly, users are not interested in visiting sites with errors or sites with low speed. Definitely, with a decrease in the number of visitors to a site, its SEO is compromised and the site’s ranking decreases. Because a smart search engine like Google will never give a high rank to a slow or error-filled site.

As a result, if the loading speed of your site is over 3 seconds or the user repeatedly encounters an error message. As soon as possible, you should take the necessary steps to upgrade your hosting so that your ranking in Google does not drop.

Limited resources and lack of suitable space in the host

In shared hosting, limited space is allocated to each user. Because several users use the same host at the same time. Perhaps it is better to raise this issue with an example. For example, when a shopkeeper increases the number of his goods, he should think about providing a bigger space. This also applies to websites and online stores. As a result, when the number of pages and visitors to their site increases, the webmaster should think about hosting upgrades.

Improve site security

Usually, websites use shared or free hosting at the beginning. Because they don’t have a lot of budget to buy hosts and dedicated virtual servers. Usually, shared hosts have a reasonable price, but it must be said that they do not have high security. In this regard, webmasters who are looking to increase the security of a site should upgrade their website as soon as possible.

Increasing the number of photos and video files on the website

As we know, humans communicate more easily and quickly with visual effects. According to the surveys, it is usually much more likely to watch a scientific video or photo on a website than to read a scientific article. For this reason, most websites try to upload attractive photos and videos on their site to increase the time users stay on the site. Usually, by increasing the number of photos and videos, the website has more space to store data. As a result, one of the important measures before increasing the number of video content is to upgrade the site’s hosting.

Increase the number of site visits

One of the things that shows the necessity of hosting upgrades is the increase in the number of users visiting the site. Because with the increase in the number of visits, the loading speed of the website decreases. Also, in order to respond to the needs of users, the number of resources should also increase. As a result, if for any reason the number of users of your website has increased, it needs a powerful host and server.

The occurrence of downtime for the site

You might ask what is Downtime? Downtime means a state where the site is unavailable and internet users cannot visit the site. This situation usually happens due to high volume of traffic. But by choosing a suitable host and upgrading it in time, this incident can be prevented.

What are your options for upgrading your hosting?

Undoubtedly, after encountering the symptoms that we mentioned in the previous section, you should think about a new hosting service for your Host. Usually, due to the high variety of hosting services, choosing a suitable hosting service is a bit difficult. In this regard, before choosing this service, be sure to check the needs of your site well so that you can find the most suitable ones. For this purpose, in the following, we will introduce you the types of hosts that you can trust to upgrade your site’s hosting:

WordPress hosting

Most of the websites on the Internet choose WordPress for their content management system. WordPress hosting is also a suitable hosting service for WordPress sites. Of course, WordPress hosting is not only for WordPress sites, but also for Joomla content management system. The following are among the most important features of this hosting service:

  • Maintaining the information of site visitors
  • Creating security for the site against bugs
  • Increasing the speed of the site when uploading or downloading files
  • Unlimited traffic

Cloud hosting

Cloud hosting is a type of hosting service that hosts the site through several interconnected virtual servers. Among the advantages of this type of hosting service, the following can be mentioned:

  1. Cloud hosting is very fast because it is built on independent servers.
  2. Access to data is possible at any place and time.
  3. Because the data is stored in several different servers, it is possible to recover the data easily.
  4. Cloud hosting is very secure.
  5. The update of these types of hosts is done automatically.

virtual server

Virtual server is also one of the suitable hosting services for your site. Because this hosting service has a powerful hardware and several application software. Online stores that are thinking of upgrading their hosting can replace shared hosting with this hosting service. Among the most obvious advantages of Ibn Sarvais, the following can be mentioned:

  • High speed
  • Prevent errors in site performance
  • Easy update
  • Data security
  • Compatibility with different operating systems such as Linux, Windows and Mikrotik
  • The price is right
  • Access to dedicated resources

dedicated server

A dedicated server is another type of website hosting service where resources are allocated exclusively to the website. In other words, if we want to express this type of service with an example. In fact, a dedicated server is like a private villa, and all its facilities belong only to the owner of the villa. If shared hosts are like residential complexes and some building facilities like elevator are shared between all units.

With these interpretations, if you are looking for high speed, excellent uptime and suitable bandwidth, the possibility to install any kind of software and make quick changes. A dedicated server is considered a very good option for hosting upgrades.

Download host

As it is clear from the names of download hosts, these types of hosts are mostly used to download and upload files. Usually, the download host is more suitable for websites that upload and download audio and video files on their site. Because other existing hosts have limited capacity and volume to store files. As a result, if you are looking to stop worrying about running out of bandwidth or slow download speed. We recommend you to use a hosting service for your site.

How to change hosts

In the previous sections of this article, we talked about the signs that indicate that you should change your hosting service. We also introduced the types of hosts that can be suitable for hosting your site. In this section, we are also going to discuss another very important topic, such as teaching the steps of changing hosts:

Choosing a suitable host

Undoubtedly, hosting upgrades should improve the performance of your site and increase its speed. In other words, you definitely intend to provide better and higher quality services to your website visitors after upgrading your hosting. As a result, you should be careful when choosing a host. Also, to host your website, use a host that is most compatible with your site’s needs.

Registration of current site information

The domain type of the site and the backup PHP version are among the important and necessary information that you need after the hosting upgrade. For this purpose, when upgrading the host, write down this information somewhere.

 Backing up the site content

The content of the site is also one of the things that you will need after the hosting upgrade. In this regard, backing up the site’s contents is one of the important stages of upgrading the hosting.

 Informing visitors

When upgrading the host and transferring its contents, the site is usually blocked for a few days. For this reason, it is better to discuss this issue with your website visitors before upgrading.

 Transfer information from the old host to the new host

After completing the previous steps, it’s time to transfer the backup content of the old Host to the new Host via FTP.

Change DNS

Domain Name System or DNS is a service in the network that is responsible for converting IP addresses to names or vice versa. Therefore, after performing the above steps, the DNS of the domain must be set according to the NS of the new hosting service.

 Deleting the site from the previous host

After setting and changing DNS and ensuring that the site is loaded on the new host, you must delete your site from the previous hosting service.

What is the difference between a dedicated server and a virtual server?

Currently, different types of web hosting services are available to users, the most important of which are shared hosting, dedicated and virtual servers. Choosing a hosting server is one of the most important steps you should take when starting your website.

Before knowing the difference between virtual and dedicated server , it is better to get familiar with the concept of server. In general, every site that operates in the virtual space is placed on a server. Now this server may be located anywhere in the world. According to this article, it can be said that a server is a hardware device that provides hosting services to users. These equipments have high security and with a series of special measures, they protect the sites from hackers.

The server has differences with the host in terms of performance and connection method. For example, the server is connected to other existing devices through the Internet and local network; If the host is connected to other devices only through the Internet. The main difference between a host and a server is that a server provides services, but a host consumes available resources.

Many users don’t know enough about the differences between servers, and some of them don’t even know which service is right for them. Therefore, it is recommended to know the different servers and distinguish their differences. This will help you make the right choice and not regret your purchase in the future. In the upcoming article, we will discuss in detail the difference between a dedicated server and a virtual server.

What is a dedicated server?

A dedicated server is one of the most popular and fastest types of servers, all of which resources are completely provided to a specific site. These services are suitable for all types of medium to large online businesses and fully cover the needs of webmasters. Of course, forward-looking small businesses can also benefit from Dedicated Server facilities.

Dedicated and virtual servers both make resources available to users, but because resources are not shared with other sites in a dedicated server; Of course, the performance and security of these services will increase significantly. A dedicated server has many advantages, including the following:

  • Customizability: This server provides a lot of flexibility for the user to apply settings.
  • High security: Since all dedicated server resources are provided to a special user, the security of the site is increased.

It goes without saying that Dedicated Server also has disadvantages. For example, these servers require specialized skills and knowledge due to their complexity, and are also considered one of the most expensive types of web hosting.


What is a virtual server?

A virtual server (VPS) is a type of service that is used for several different websites at the same time. VPS allows users to choose the bandwidth as well as the required hardware power according to their wishes.

In these services, each site uses a part of the mother server’s hardware resources, and at the same time, there is no obligation to share it with other sites. This advantage has caused the current costs of webmasters to be greatly reduced and this type of web hosting is most useful for small sites and blogs.

It should be noted that dedicated and virtual servers are very similar. In fact, we can say that VPS is a small version of a dedicated server; Therefore, it is natural to have more limited resources. One of the interesting features of the virtual server is that it uses a special program called Hypervisor so that those users who have exceeded their hardware limit can use the resources of other sites that have not yet reached the desired limit. VPS has many advantages, the most important of which are:

  • Easy setup: The nature of this web hosting is designed so that their setup is done quickly. In fact, the servers only need to be activated.
  • Reasonable cost: The price of the virtual server is affordable and does not impose much cost on the user.

There are storage limitations in a virtual server. Also, security breach is another disadvantage of this hosting.

The difference between a dedicated server and a virtual server

As mentioned, servers are very powerful computers that are responsible for supporting various sites. Due to the great power of these large computers, they can be divided into sections and each of them can host a specific site. The servers are connected to a high-speed Internet 24 hours a day and are at a very high level in terms of processing power.

Dedicated and virtual servers are one of the most important types of servers that are provided by hosting companies with different hardware power and different rates depending on the needs of your site. Virtual and dedicated servers have differences that make each of them suitable for a series of sites. In the following, these differences are examined so that you can make an easier decision when buying and choose a service that is suitable and affordable for you.

Price

Dedicated and virtual servers are different in terms of the cost they impose on site administrators. As mentioned above, in a dedicated server, all resources are completely provided to a site. This leads to an increase in the price of the relevant service; Because the entire cost of its maintenance must be paid by the manager of the said site.

Meanwhile, in virtual servers, resources are shared between all users who use the hosting in question. Each user is also obliged to pay only the cost of the part he uses. So, if you are in the initial stages of setting up your online business and you don’t have enough budget, you can buy virtual servers and upgrade it if you want after reaching income.

resource allocation

Another difference between a virtual server and a dedicated server is the amount of resources allocated to each website. In a virtual server, you can get as many server resources as you want. On the other hand, there is no obligation to share your resources with other sites.

One of the reasons for the popularity of dedicated servers is that the site manager takes advantage of the maximum capacity of storage space and processor power. If in virtual servers all these resources are divided between different sites.

 security

In general, it can be said that both dedicated and virtual servers have an acceptable quality in terms of security. But if we want to compare the security of these two, the level of security of dedicated hosting is at a higher level.

Because in VPS resources are shared between several different sites; If one of the websites does not comply with security issues, hackers can penetrate that site. Then they access the server and other sites through the relevant site and put their information at risk. In any case, you can improve the security of the dedicated virtual server by installing software designed for this purpose.

 Function

Performance refers to how fast the website loads. The importance of optimal site speed is not hidden to anyone, because sites with optimal loading speed are very popular among users. In addition, they can be placed in a good position in terms of SEO.

Dedicated and virtual servers have differences in terms of performance. Due to the limitation of bandwidth and resources in virtual hosting, it is natural that its performance is lower than that of dedicated hosting. So the speed of sites that use a virtual server is lower compared to sites that are set up on dedicated hosting.

The virtual server provides optimal loading speed to users, but if a number of sites face an increase in traffic, it is possible that the loading speed of your site will decrease. Increasing speed can help improve your SEO ranking. Therefore, if site loading speed is very important to you, it is better to choose Dedicated Server for purchase.

Configuration and personalization

Another difference between dedicated and virtual servers is their configuration and customization capabilities. If you buy a dedicated server, you will be given the opportunity to configure different parts and apply the necessary settings.

In fact, in virtual servers, hosting management is in the hands of the owner, and service providers also provide the necessary access to webmasters. But these accesses have limitations compared to dedicated servers. In such a way that it is not possible to install some programs for website administrators. They also cannot change settings in a way that compromises the security of other sites.

Scalability

Another difference between virtual and dedicated servers is their scalability. In terms of this feature, virtual servers are superior; Because they are much more flexible. In VPS, a part of the resources is considered for the user, without changing the hardware. To put it more clearly, in virtual servers, resources and space can be changed depending on the needs of site administrators.

On the other hand, the configuration of dedicated servers is not possible due to the use of special hardware. Although dedicated servers allow the site manager access to complete hardware resources; But the expansion of resources requires adding a series of slots and modules, and this process can impose a lot of cost on the user.

Which server is right for you?

Choosing the right service is not an easy task and often challenges users. In order to find out which of the dedicated and virtual servers is right for you, you must consider a series of factors and make a decision based on it. In fact, which type of hosting is right for you depends entirely on your personal needs and the type of site you have set up.

For example, if we want to compare dedicated and virtual server in terms of resource allocation, dedicated hosting is superior; Because all the resources are available to one person. Therefore, if you do not have a budget limit, it is recommended to choose these services to have the maximum features and facilities.

In terms of personalization, although both cases are very similar; But dedicated hosting provides more customization capabilities to the user. According to this article, if you need special configurations, a dedicated server will be the best option for you.

The price is one of the most important mental concerns of those who plan to start a website in the virtual space and earn money. In terms of price, virtual servers are offered with cheaper tariffs; So, if you have limited budget and financial resources, you can prioritize VPS purchase.v

How to install NMAP on Linux?

Network Mapper, abbreviated as NMAP, is an open-source security diagnostic and network inspection tool. This software is designed for fast scanning of large networks, but it also works well on single hosts. NMAP uses raw IP packets in a new way to determine what hosts are available on the network, what services these hosts provide (application name and version), what operating systems they run (what version), what They have filter/firewall package type and many other features. Although NAMP is used for security inspections, many users also use it for routine tasks; Such as network management, service upgrade scheduling management, and hosting or service access time monitoring.


Installing NMAP on Linux

Follow the command below to install NMAP:

dnf install nmap -y

Some useful Nmap commands on Linux:


Ping scan:

nmap -v -sn google.com

IP address scan:

nmap 192.168.116.147

Checking open ports to determine service and version information:

nmap -v -A google.com


nmap -sV google.com

There are other useful commands you can find by checking the NMAP man pages:

man nmap


How to install Apache JMeter on CentOS 8 / RHEL 8?

Apache JMeter is a product of Apache company, an open source program. A Java-based program designed for performance testing and evaluation. JMeter was originally developed for web application testing, but it has expanded its functions and is now used to test other functions as well. This software may be used to test the performance of static and dynamic resources and dynamic web applications. Usually, this software is used to simulate a heavy load on a server, a group of servers, a network or an object so that their strength can be evaluated or their overall performance can be analyzed under various loads.

In this section, you will learn how to install it on CentOS 8 / RHEL 8.


Features of Apache JMeter

  • Some of the features of this software are as follows:
  • The ability to test the performance and load of applications, servers and different protocols such as (FTP, SMTP, TCP, Apache…)
  • Dynamic HTML report generation
  • Extract data in HTML, JSON, XML or any other text format
  • Portable and 100% Java
  • Multi-threading, testing and debugging
  • It has a CLI (Command Line Interface) mode for load testing from any Java compatible operating system
  • Offline storage and analysis / repeat test results


Installing Apache JMeter on CentOS 8 / RHEL 8

  1. Install Java

The first step is to install the Java program. This program is compatible with Java 8 and above:

dnf install java-11-openjdk-devel -y


After installation, you can confirm the Java version with the help of this command:

java -version


  1. Install Apache JMeter

To install, you can download the latest version from its website. Use this command to download:

cd

wget https://downloads.apache.org//jmeter/binaries/apache-jmeter-5.4.1.tgz

ls


Now open the downloaded package:

tar zxvf apache-jmeter-5.4.1.tgz

ls


After opening, there is no need to install. Just go to the apache-jmeter-5.4.1/bin directory and enable Jmeter with this command:

cd apache-jmeter-5.4.1/bin/

./jmeter


The installation is finished. Now you can run JMeter and analyze and evaluate the performance of various services.

Installing KVM on CentOS 7 Linux server

How to install and configure KVM on CentOS 7 or RHEL servers? How to install KVM tool on CentOS 7 and use cloud images to install guest virtual machine? These are the questions we seek to answer in this article. Stay with us.

Kernel-based Virtual Machine or KVM is an emulation software for CentOS or RHEL 7. KVM turns your server into a control center. In this article, we will show you how to install and manage a virtual environment with the help of KVM tool on Linux CentOS 7 or RHEL 7. Also, the method of installing and managing virtual machines (VM) in a physical server using CLI will be explained. Make sure that the simulation technology or VT is enabled in your server’s BIOS. Meanwhile, you can check Intel VT CPU support and AMD-V emulation using the following command.

1
2
3
$ lscpu | grep Virtualization
Virtualization: VT-x

Follow the steps below to install KVM tool on CentOS 7/RHEL 7 server.

Step 1) Install KVM tool

Type the following yum command.

1
# yum install qemu-kvm libvirt libvirt-python libguestfs-tools virt-install

Installing KVM tool on CentOS 7/RHEL 7 Linux server

Start the libvirtd service.

1
2
3
# systemctl enable libvirtd
# systemctl start libvirtd

Step 2) Verify KVM installation

Make sure the KVM module is loaded with lsmod and grep commands.

1
# lsmod | grep -i kvm

Step 3) Setting up the bridge network

A dhcpd-based bridge network is configured by libvirtd by default. You can check this issue using the following commands.

1
2
3
# brctl show
# virsh net-list

Default KVM network

All virtual machines (of guest type) only have network access to other VMs on the same server. Here, a private network 192.168.122.0/24 will be created for you. Check it out.

1
# virsh net-dumpxml default

If you want your virtual machines to be available to other servers on the LAN, you need to set up a bridge network on the server connected to the LAN. For this purpose, update the nic configuration file such as ifcfg-enp3s0 or em1.

1
# vi /etc/sysconfig/network-scripts/enp3s0

Add the following line.

1
BRIDGE=br0

Save and close the file in vi. Then edit and add the /etc/sysconfig/network-scripts/ifcfg-br0 file.

1
# vi /etc/sysconfig/network-scripts/ifcfg-br0

Add the following lines.

1
2
3
4
5
6
7
8
9
10
11
12
13
14
15
DEVICE="br0"
# I am getting ip from DHCP server #
BOOTPROTO="dhcp"
IPV6INIT="yes"
IPV6_AUTOCONF="yes"
ONBOOT="yes"
TYPE="Bridge"
DELAY="0"

Restart the network service. Note that the ssh command will terminate and it is better to start over.

1
# systemctl restart NetworkManager

Check the issue with the brctl command.

1
# brctl show

Step 4) Create your first virtual machine.

Here we are going to create a VM on CentOS 7.x. First, get the latest version of the CentOS 7.x image using the wget command.

1
2
3
# cd /var/lib/libvirt/boot/
# wget https://mirrors.kernel.org/centos/7.4.1708/isos/x86_64/CentOS-7-x86_64-Minimal-1708.iso

Check ISO images

1
2
3
# wget https://mirrors.kernel.org/centos/7.4.1708/isos/x86_64/sha256sum.txt
# sha256sum -c sha256sum.txt

Creating a CentOS 7.x virtual machine

Here, we are going to create a CentOS 7.x virtual machine with 2 GB of RAM, two CPU cores, one nic and 40 GB of disk space. For this purpose we have:

1
2
3
4
5
6
7
8
9
10
11
12
13
14
15
16
17
18
19
# virt-install \
--virt-type=kvm \
--name centos7 \
--ram 2048 \
--vcpus=1 \
--os-variant=centos7.0 \
--cdrom=/var/lib/libvirt/boot/CentOS-7-x86_64-Minimal-1708.iso \
--network=bridge=br0,model=virtio \
--graphics vnc \
--disk path=/var/lib/libvirt/images/centos7.qcow2,size=40,bus=virtio,format=qcow2

To set vnc input from another terminal via ssh we have:

1
2
3
# virsh dumpxml centos7 | grep vnc
<graphics type='vnc' port='5901' autoport='yes' listen='127.0.0.1'>

Here you need to write down the port number or 5901. To access the remote vnc server, you need to use an SSH client to set up the tunnel and a VNC client. Through the client or desktop, type the SSH port forwarding command as follows.

1
$ ssh [email protected] -L 5901:127.0.0.1:5901

Once the ssh tunnel is established, you can point your VNC client to localhost 127.0.0.1 and port 5901 as follows.

VNC client reference

In this case, you should see the CentOS Linux guest installation page as below.

CentOS Linux installation welcome screen

Now just follow the instructions that appear on the screen and install CentOS 7. When the installation is finished, click the reboot button. The remote server has closed the connection with the VNC client. You can reconnect using the KVM tool to configure other parts of the server, including the SSH service or firewall.

How to build a RHEL 7.x virtual machine

First, you must have the rhel-server-7.3-x86_64-dvd.iso file saved. Here we create a RHEL 7.x virtual machine with 2 GB of RAM, two CPU cores, one nic and 40 GB of disk space.

1
2
3
4
5
6
7
8
9
10
11
12
13
14
15
16
17
18
19
# virt-install \
--virt-type=kvm \
--name rhel7 \
--memory=2048,maxmemory=4096 \
--vcpus=2 \
--os-variant=rhel7.3 \
--cdrom=/var/lib/libvirt/boot/rhel-server-7.3-x86_64-dvd.iso \
--network=bridge=virbr0,model=virtio \
--graphics vnc \
--disk path=/var/lib/libvirt/images/rhel7.qcow2,size=40,bus=virtio,format=qcow2

To configure vnc input from another terminal via ssh we have:

1
2
3
$ sudo virsh dumpxml rhel7 | grep vnc
<graphics type='vnc' port='5904' autoport='yes' listen='127.0.0.1'>

Here you need to write down the port number or 5904. To access the remote vnc server, you need to use an SSH client to set up the tunnel and a VNC client. Through the client or desktop, type the SSH port forwarding command as follows.

1
$ ssh [email protected] -L 5904:127.0.0.1:5904

Once the ssh tunnel is established, you can point the VNC client to localhost 127.0.0.1 and port 5904 to proceed with the next steps of the RHEL 7.x installation.

Step 5) Using cloud images

The installation method presented above can be suitable for educational purposes or a virtual machine. But if you want to use more number of virtual machines, it is better to try cloud images. It will be possible to edit “pre-production” cloud images according to your needs. For example, you can add a user, enter ssh keys, and set the time zone. Now let’s see how to create a virtual machine with 1 GB of RAM, 20 GB of disk space and a vCPU in CentOS 7 in this way.

Download CentOS 7 cloud image

1
2
3
# cd /var/lib/libvirt/boot
# wget http://cloud.centos.org/centos/7/images/CentOS-7-x86_64-GenericCloud.qcow2

Generating the required directories

1
2
3
4
5
6
7
# D=/var/lib/libvirt/images
# VM=centos7-vm1 ## vm name ##
# mkdir -vp $D/$VM
mkdir: created directory '/var/lib/libvirt/images/centos7-vm1'

Create meta-data file

1
2
3
# cd $D/$VM
# vi meta-data

Add the following in this file.

1
2
3
instance-id: centos7-vm1
local-hostname: centos7-vm1

Create user-data file

Here we want to log into the VM via ssh keys. Accordingly, first make sure that the ssh keys are in place.

1
# ssh-keygen -t ed25519 -C "VM Login ssh key"

ssh-keygen command

Now edit user-data as below.

1
2
3
# cd $D/$VM
# vi user-data

Add the following according to your settings.

1
2
3
4
5
6
7
8
9
10
11
12
13
14
15
16
17
18
19
20
21
22
23
24
25
26
27
28
29
30
31
32
33
34
35
36
37
38
39
40
41
42
43
44
45
46
47
48
49
50
51
52
53
54
55
56
57
#cloud-config
# Hostname management
preserve_hostname: False
hostname: centos7-vm1
fqdn: centos7-vm1.nixcraft.com
# Users
users:
- default
- name: vivek
groups: ['wheel']
shell: /bin/bash
sudo: ALL=(ALL) NOPASSWD:ALL
ssh-authorized-keys:
- ssh-ed25519 AAAAC3NzaC1lZDI1NTE5AAAAIIMP3MOF2ot8MOdNXCpHem0e2Wemg4nNmL2Tio4Ik1JY VM Login ssh key
# Configure where output will go
output:
all: ">> /var/log/cloud-init.log"
# configure interaction with ssh server
ssh_genkeytypes: ['ed25519', 'rsa']
# Install my public ssh key to the first user-defined user configured
# in cloud.cfg in the template (which is centos for CentOS cloud images)
ssh_authorized_keys:
- ssh-ed25519 AAAAC3NzaC1lZDI1NTE5AAAAIIMP3MOF2ot8MOdNXCpHem0e2Wemg4nNmL2Tio4Ik1JY VM Login ssh key
# set timezone for VM
timezone: Asia/Kolkata
# Remove cloud-init
runcmd:
- systemctl stop network && systemctl start network
- yum -y remove cloud-init

Copy the cloud image.

1
2
3
# cd $D/$VM
# cp /var/lib/libvirt/boot/CentOS-7-x86_64-GenericCloud.qcow2 $VM.qcow2

Create a 20 GB disk image

1
2
3
4
5
6
7
# cd $D/$VM
# export LIBGUESTFS_BACKEND=direct
# qemu-img create -f qcow2 -o preallocation=metadata $VM.new.image 20G
# virt-resize --quiet --expand /dev/sda1 $VM.qcow2 $VM.new.image

Set VM image disk size

Overwrite the resized image.

1
2
3
# cd $D/$VM
# mv $VM.new.image $VM.qcow2

Create a cloud-init ISO file

1
# mkisofs -o $VM-cidata.iso -V cidata -J -r user-data meta-data

Create a cloud-init ISO file

Create a pool

1
2
3
# virsh pool-create-as --name $VM --type dir --target $D/$VM
Pool centos7-vm1 created

Installing a CentOS 7 virtual machine

1
2
3
4
5
6
7
8
9
10
11
12
13
14
15
16
17
18
19
# cd $D/$VM
# virt-install --import --name $VM \
--memory 1024 --vcpus 1 --cpu host \
--disk $VM.qcow2,format=qcow2,bus=virtio \
--disk $VM-cidata.iso,device=cdrom \
--network bridge=virbr0,model=virtio \
--os-type=linux \
--os-variant=centos7.0 \
--graphics spice \
--noautoconsole

Delete unnecessary files

1
2
3
4
5
# cd $D/$VM
# virsh change-media $VM hda --eject --config
# rm meta-data user-data centos7-vm1-cidata.iso

Find KVM device IP address or dhcp address

1
# virsh net-dhcp-leases default

Creating a CentOS7 virtual machine

Log into the VM

Use the ssh command as follows.

Sample VM implementation

Useful commands

We review some useful commands for managing virtual machines.

List of all VMs

1
# virsh list --all

Get VM information

1
2
3
# virsh dominfo vmName
# virsh dominfo centos7-vm1

Stopping and shutting down a VM

1
# virsh shutdown centos7-vm1

Start the VM

1
# virsh start centos7-vm1

Set the VM to start automatically at system startup

1
# virsh autostart centos7-vm1

Reboot (soft and safe reboot) the VM

1
# virsh reboot centos7-vm1

Reboot (hard and insecure) VM

1
# virsh reset centos7-vm1

Remove the VM

1
2
3
4
5
6
7
8
9
10
11
# virsh shutdown centos7-vm1
# virsh undefine centos7-vm1
# virsh pool-destroy centos7-vm1
# D=/var/lib/libvirt/images
# VM=centos7-vm1
# rm -ri $D/$VM

To see the general list of virsh command types, we have:

1
2
3
# virsh help | less
# virsh help | grep reboot

Notes about virt-builder

It is possible to quickly build virtual machine images in CentOS 7 using the virt-builder command.

List of VM images

1
2
3
4
5
6
7
8
9
virt-builder --list
virt-builder --list | grep -i fedora
virt-builder --list | grep -i debian
virt-builder --list | grep -i ubuntu
virt-builder --list | grep -i freebsd

Creating Ubuntu 16.04 LTS virtual machine

1
2
3
4
5
6
7
8
9
10
11
12
13
# virt-builder ubuntu-16.04 \
--size=20G --format qcow2 -o /var/lib/libvirt/images/ncbz01-disk01.qcow2 \
--hostname ncbz01 --network --timezone Asia/Kolkata \
--firstboot-command "dpkg-reconfigure openssh-server" \
--edit '/etc/default/grub:
s/^GRUB_CMDLINE_LINUX_DEFAULT=.*/GRUB_CMDLINE_LINUX_DEFAULT="console=tty0 console=ttyS0,115200n8"/' \
--run-command update-grub

Sample output (note that the random root password will be displayed on the screen):

1
2
3
4
5
6
7
8
9
10
11
12
13
14
15
16
17
18
19
20
21
22
23
24
25
26
27
28
29
30
31
32
33
34
35
[   3.9] Downloading: http://libguestfs.org/download/builder/ubuntu-16.04.xz
######################################################################## 100.0%
[ 121.7] Planning how to build this image
[ 121.7] Uncompressing
[ 126.5] Resizing (using virt-resize) to expand the disk to 20.0G
[ 142.1] Opening the new disk
[ 143.8] Setting a random seed
[ 143.8] Setting the machine ID in /etc/machine-id
[ 143.8] Setting the hostname: ncbz01
[ 144.3] Setting the timezone: Asia/Kolkata
[ 144.3] Setting passwords
virt-builder: Setting random password of root to 1KTLsuVx14k989eq
[ 144.9] Finishing off
Output file: /var/lib/libvirt/images/ncbz01-disk01.qcow2
Output size: 20.0G
Output format: qcow2
Total usable space: 18.6G
Free space: 17.7G (94%)

Now that the image is created, it’s time to install the VM.

1
2
3
4
5
6
7
8
9
10
11
12
13
# virt-install --import --name ncbz01 \
--ram 2048 \
--vcpu 2 \
--disk path=/var/lib/libvirt/images/ncbz01-disk01.qcow2,format=qcow2 \
--os-variant ubuntu17.04 \
--network=bridge=virbr0,model=virtio \
--noautoconsole

Performance:

1
# virsh start ncbz01

Log into the VM

1
# virsh console ncbz01

Conclusion

In this article, you learned how to install and set up the KVM tool on servers with CentOS 7 or RHEL 7 Linux operating systems. We hope that this article has also received your attention.

support hosting100